
This is an independent field manual for compact DeWalt 20V-style cordless chainsaws. It is written for homeowners trimming limbs, storm cleanup, and firewood prep around a backyard or small property. Always confirm your exact chain pitch, gauge, and drive-link count against your saw label or official manual before buying parts.
What you need on the bench
Work on a patio table, shed bench, or tailgate where the saw can sit flat. Keep the battery away from the saw until the chain is fully installed and checked.
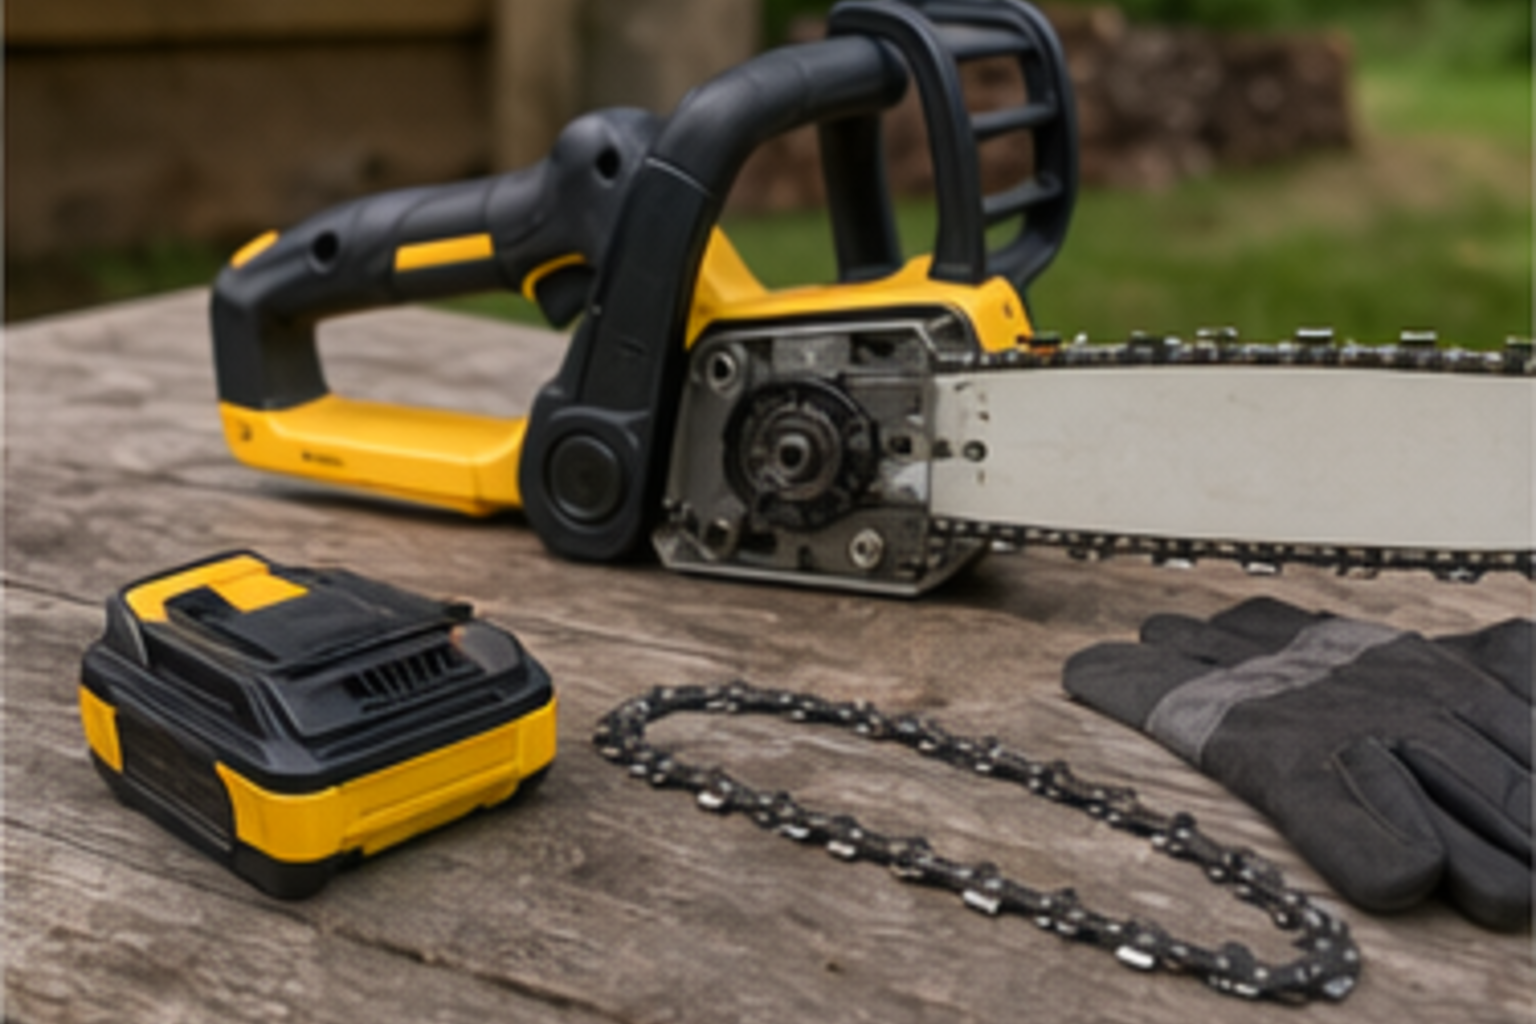
- Replacement chain with the correct pitch, gauge, and drive-link count.
- Gloves, eye protection, and a scrench or socket wrench.
- Small brush for cleaning chips around the sprocket cover.
- Bar oil, because a dry first run can damage a new chain quickly.
Step 1: Remove the battery and open the side cover
Take the battery off first and set it somewhere you cannot accidentally grab it. Loosen the side-cover nut or captive knob, then remove the cover. Brush packed chips from the sprocket, bar studs, tensioning pin, and oil slot.
If the old chain is jammed under the sprocket cover, do not pry against plastic. Back the tension screw off until the bar moves inward, then lift the chain free.
Step 2: Check chain direction before tensioning
The cutting teeth on the top run of the bar must point forward toward the bar nose. On many homeowner saws this is the most common installation mistake.
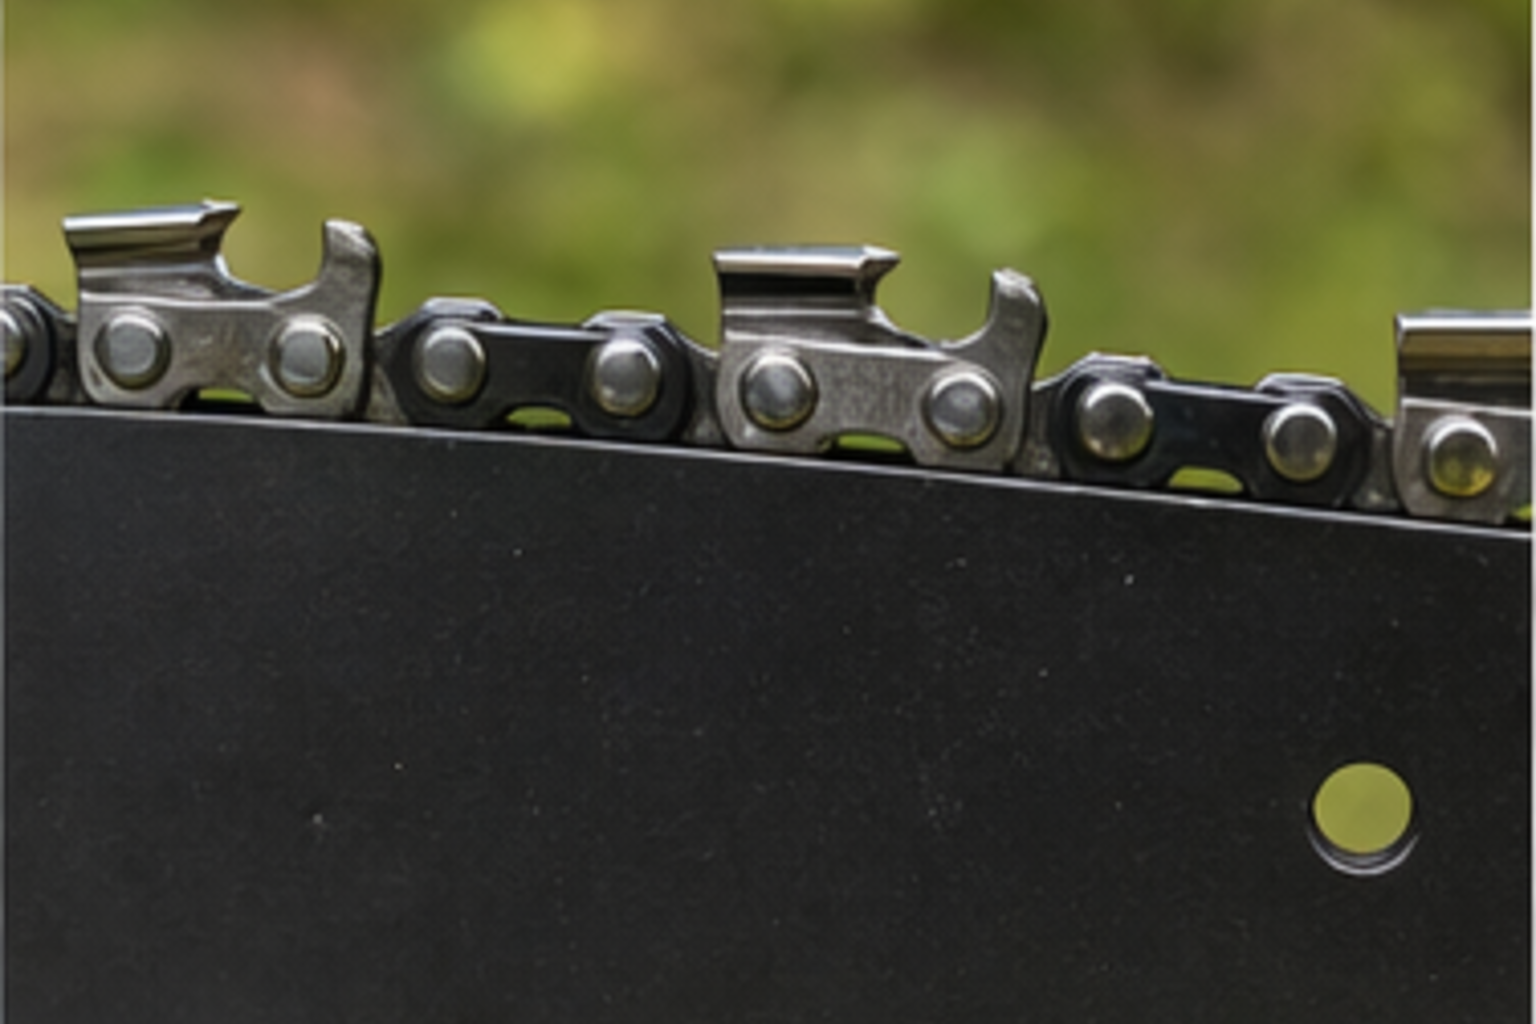
Loop the chain around the drive sprocket first, then seat the drive links into the bar groove all the way to the nose. If one section rides high, stop and reseat it before putting the cover back on.
Step 3: Tension it like a homeowner saw, not a shop saw
Reinstall the cover finger-tight. Lift the bar nose with one hand and turn the tension screw until the chain touches the underside of the bar without sagging. It should still pull around the bar by gloved hand.
Add bar oil, install the battery, and make one short test cut in clean wood. Stop, remove the battery, and recheck tension. A new chain often settles after the first minute.
Common backyard mistakes
| Symptom | Likely cause | Fix |
|---|---|---|
| Chain smokes | Dry bar or too much tension | Add oil and loosen slightly |
| Saw cuts crooked | Dull old bar groove or uneven chain | Inspect bar rails and chain seating |
| Chain jumps off | Too loose or drive links not seated | Reinstall and retension |
| No oil on chain | Oil slot packed with chips | Clean bar pad and oil port |