
Most hose-end leaks are not mysterious. They come from one of three places: a crushed flat washer, dirty threads that never let the fitting seat properly, or a quick-connect that was tightened over grit and stayed crooked all season.
Start at the female fitting
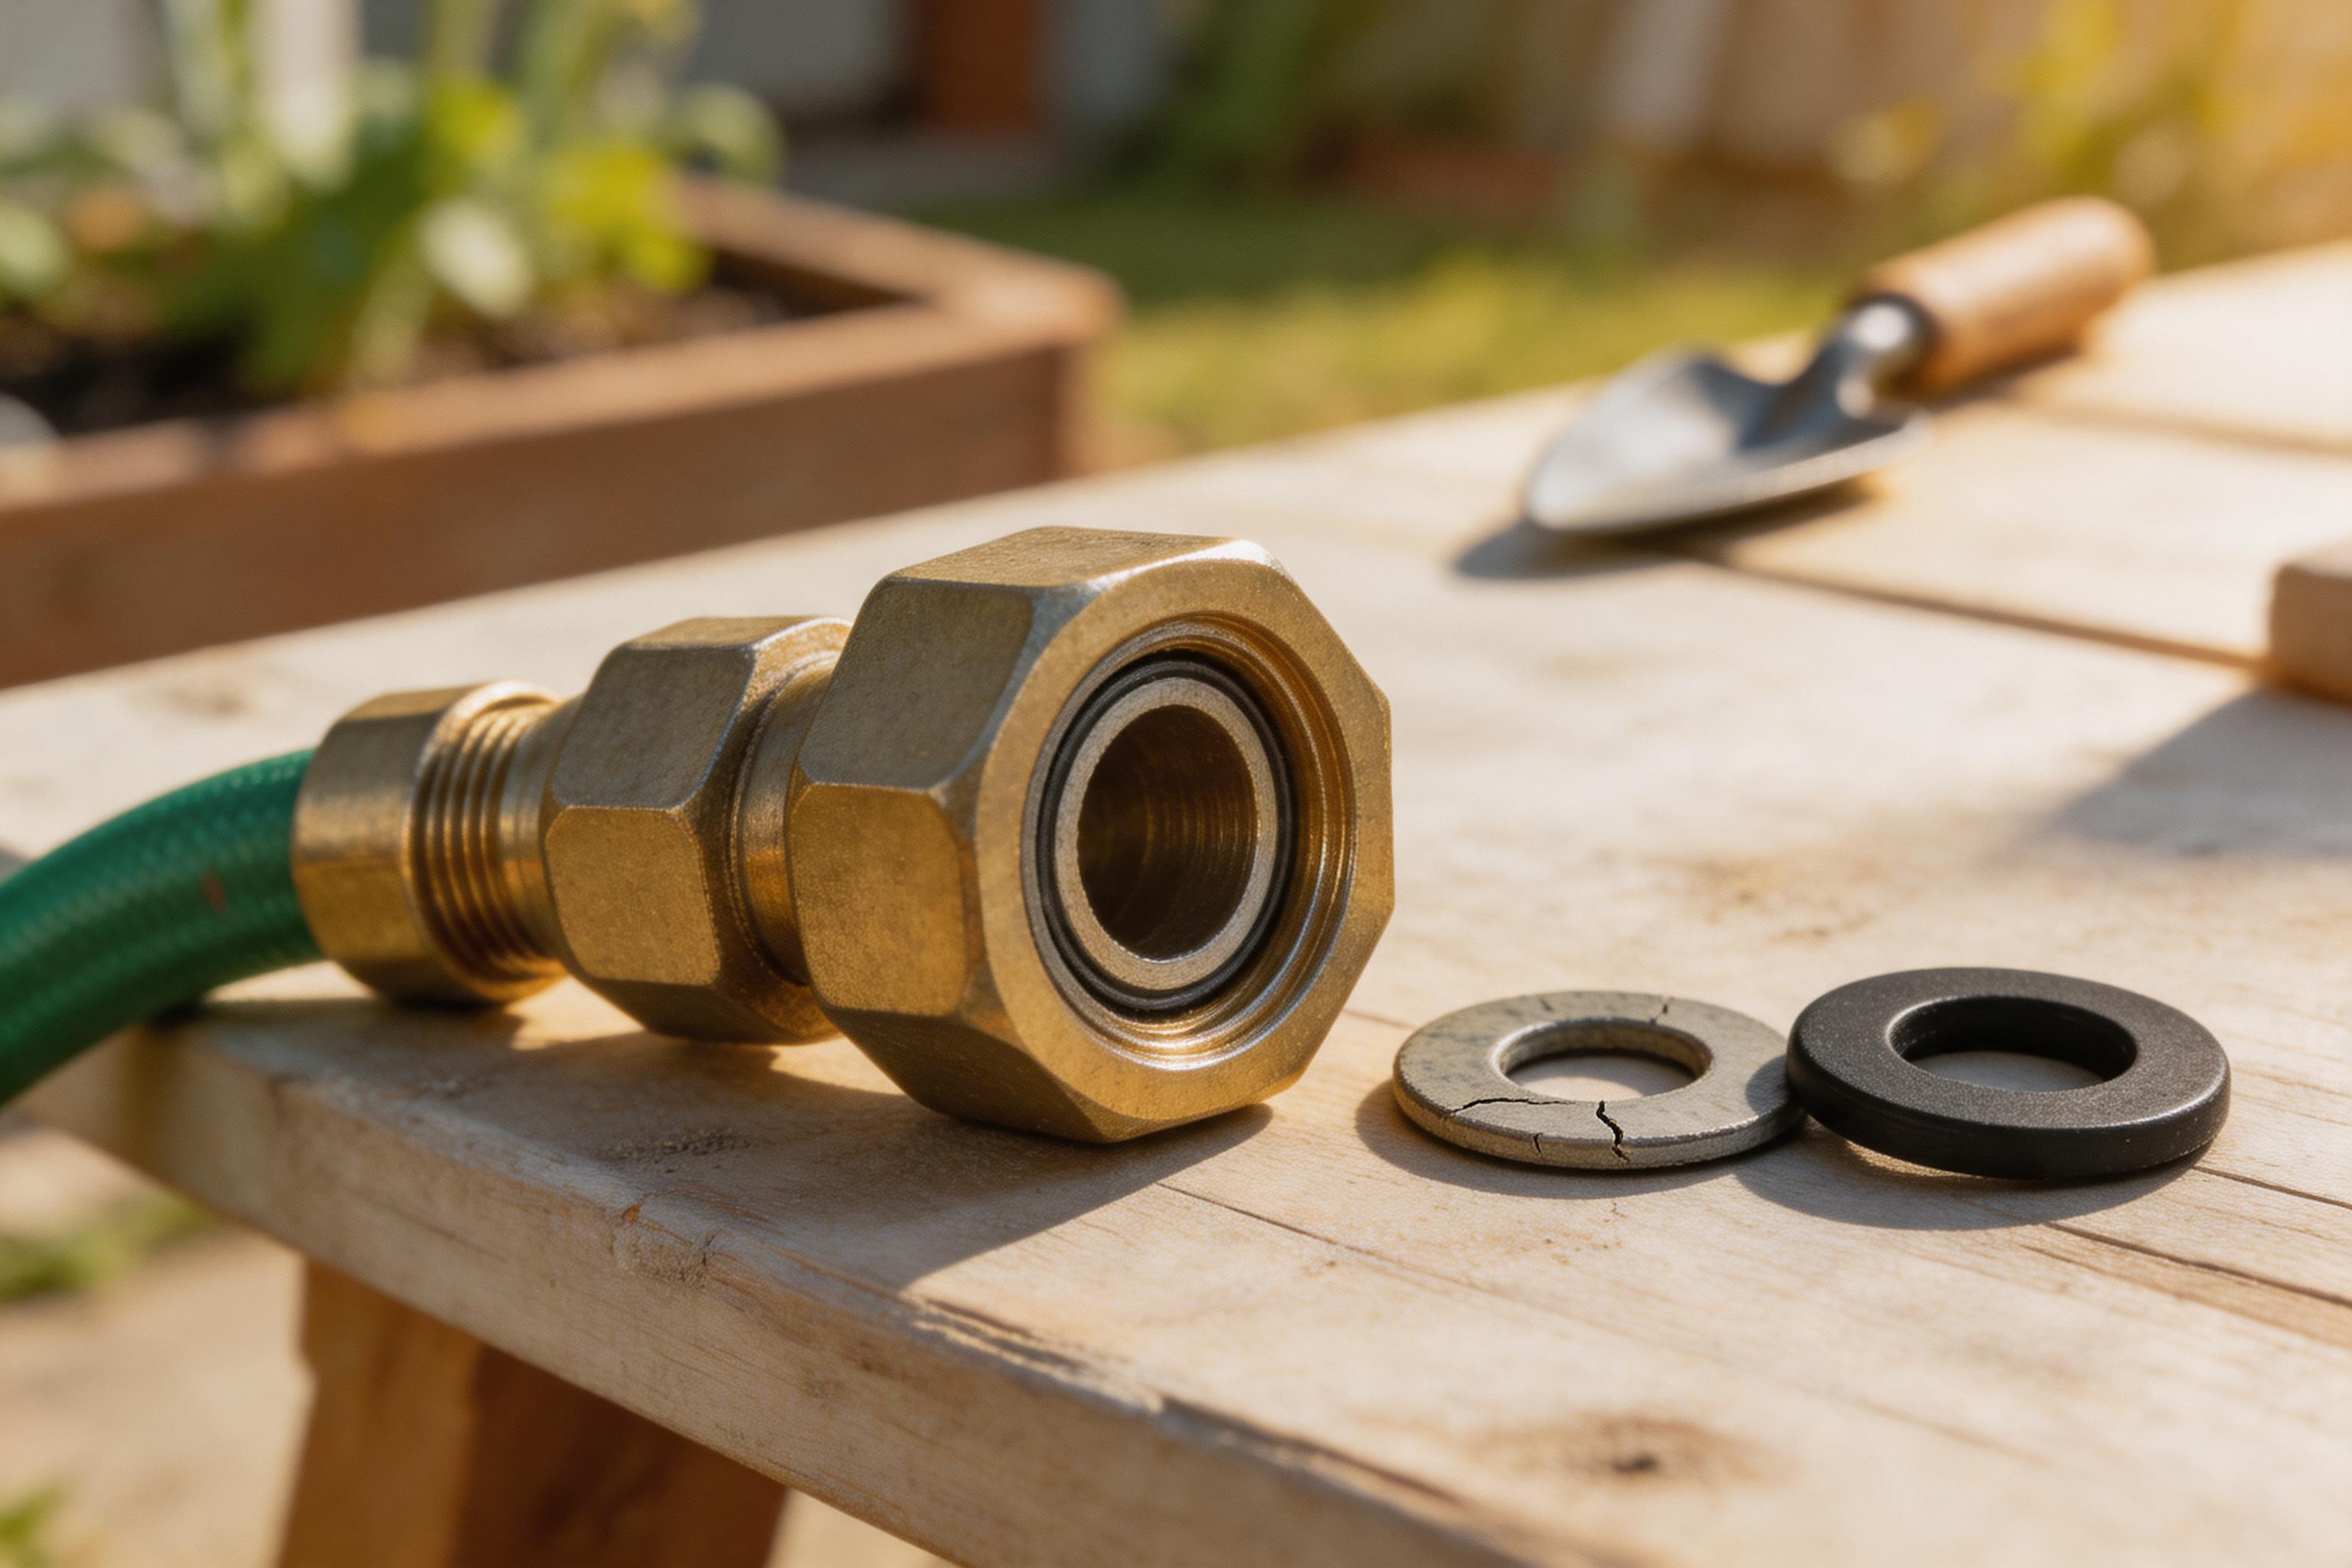
Unscrew the hose from the spigot and look inside the female fitting first. If the washer is hard, split, or flattened into a shiny ring, replace it before you do anything more dramatic.
That simple replacement cures more leaks than extra force ever will.
Clean the threads before blaming the hardware
Wipe both the hose threads and the spigot threads clean. Mineral scale, sand, and dried mud keep the washer from compressing evenly. If the threads feel rough, scrub them lightly before reinstalling the hose.
Re-seat quick-connects carefully
If you use brass or plastic quick-connects, inspect the O-ring and the locking collar. A connector that clicks in while slightly cocked will still drip under pressure. Remove it, check the O-ring, then reconnect it squarely.
What a good fix looks like
- Washer sits flat, not twisted.
- Threads start by hand without cross-binding.
- Quick-connect collar locks evenly.
- No drip at low flow before full pressure.
If a leak remains after a new washer and clean threads, the fitting itself may be cracked. Replace it instead of overtightening it.