
This guide covers the 128LD-style split-shaft trimmer format. Use it as a practical replacement workflow, then confirm the exact head and line size against your machine's manual.
Compatibility checks
- Match the trimmer head style before matching the spool.
- Confirm line diameter; too thick binds, too thin overfeeds.
- Inspect the bump-knob threads and spring before replacing only the spool.
- Replace cracked caps instead of forcing them to latch.
Remove and inspect
Disconnect the spark plug boot. Turn the head over and remove the cap or bump knob according to the head style. Pull out the old spool and look for melted line, packed grass, or cracked plastic around the eyelets.
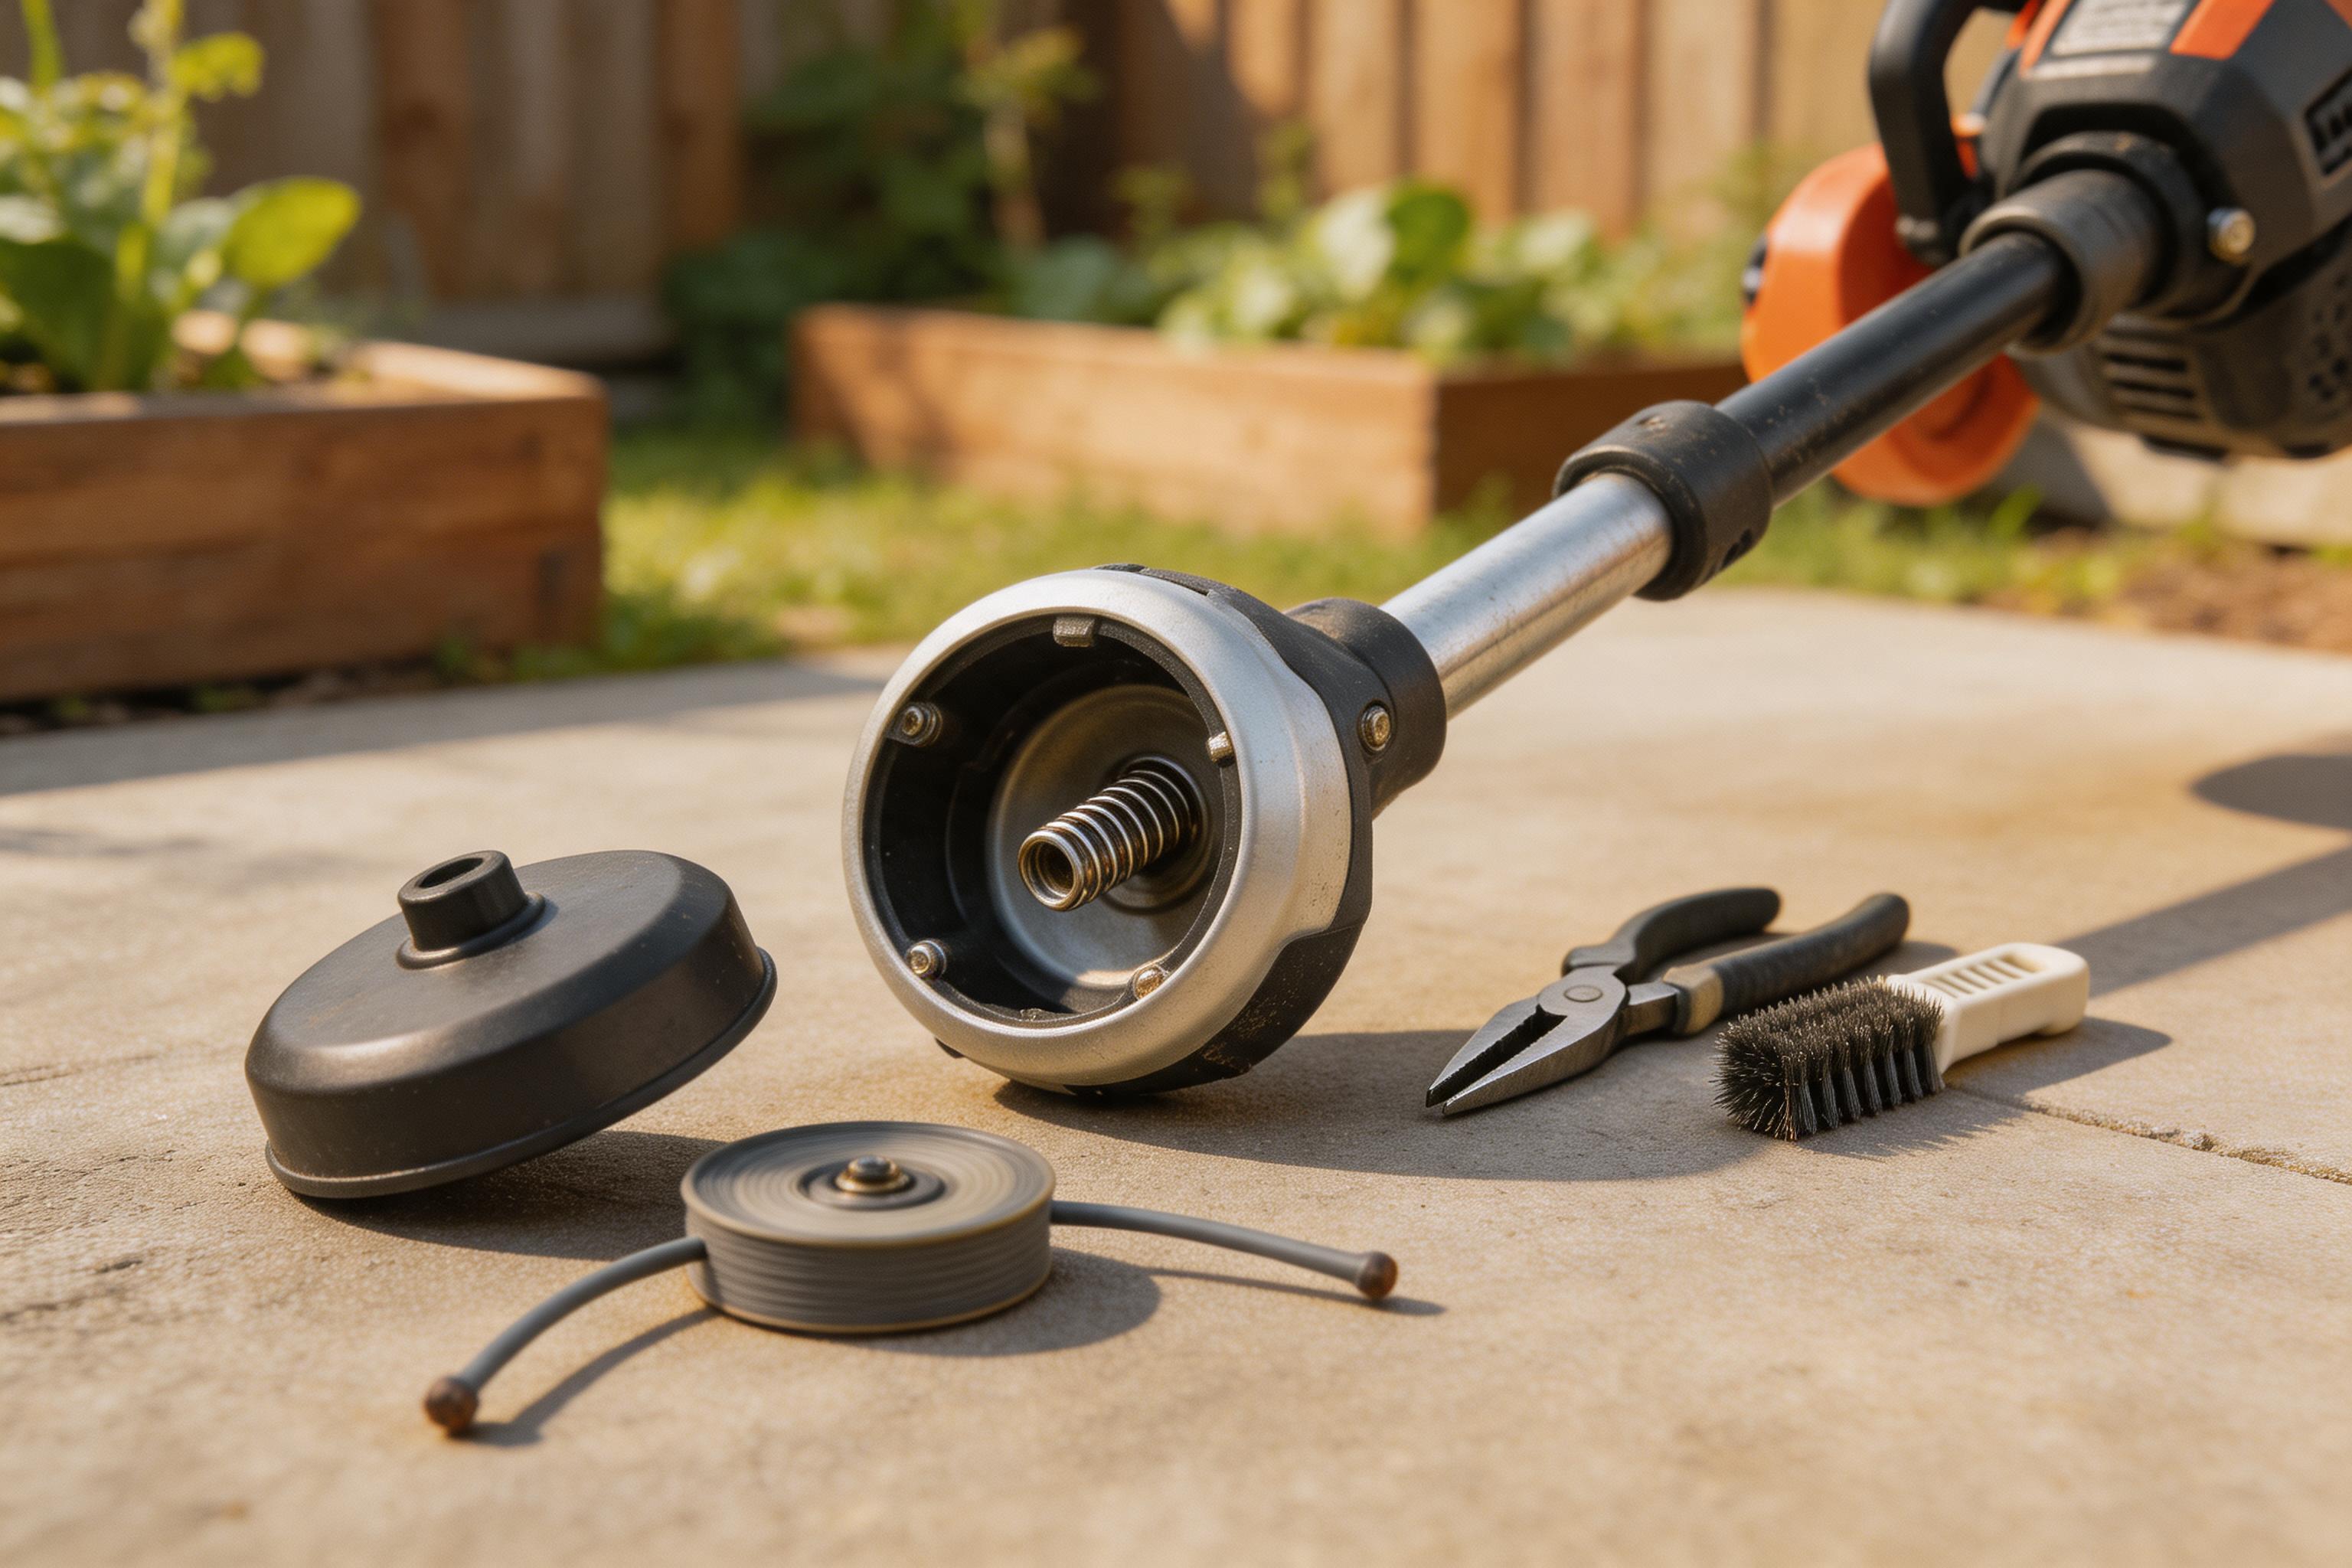
If the spool cavity is gritty or the eyelets have sharp wear grooves, clean or replace that hardware before loading fresh line. New line will not fix a damaged path.
Reload or replace
If you are using a pre-wound spool, seat it flat on the hub and route both line ends through the eyelets before closing the head. If you are winding line by hand, follow the arrow molded into the spool and keep the wraps tight and parallel.
Clean-feed test
After reassembly, pull both line ends evenly. They should move without snagging. Start the trimmer over open grass and bump the head once at low throttle to confirm feed before trimming along a fence line or around stone borders.
What a good repair feels like
| Check | Good sign | Red flag |
|---|---|---|
| Cap fit | Both sides seat evenly | One tab sits proud |
| Line pull | Slides with light resistance | Jerks or binds |
| First bump | Short, controlled advance | Dumps too much line |
| Sound | Even engine note | Rattle from the head |