
Which saws this covers
Almost every consumer chainsaw sold at a U.S. big-box retailer uses the same side-access bar swap: two bar nuts on a clutch cover, a single tensioner screw, a slotted bar that slides on two studs, and a chain that wraps the clutch drum sprocket.
If your saw has a tool-less tensioner, the bar nuts are replaced by a knob and a dial, but the sequence below is otherwise identical.
Before you start
Two things to have on the bench before you begin: a scrench and a rag. Bar oil will drip when you pull the cover.
Confirm you bought the right bar and chain. Three numbers on the old bar, length, pitch, and gauge, must match the new bar. The chain's drive-link count has to match the new bar's length, and its pitch and gauge must match the chain you are buying.
If any of those numbers do not match, stop. A mismatched chain will either ride out of the groove or wear the sprocket prematurely.
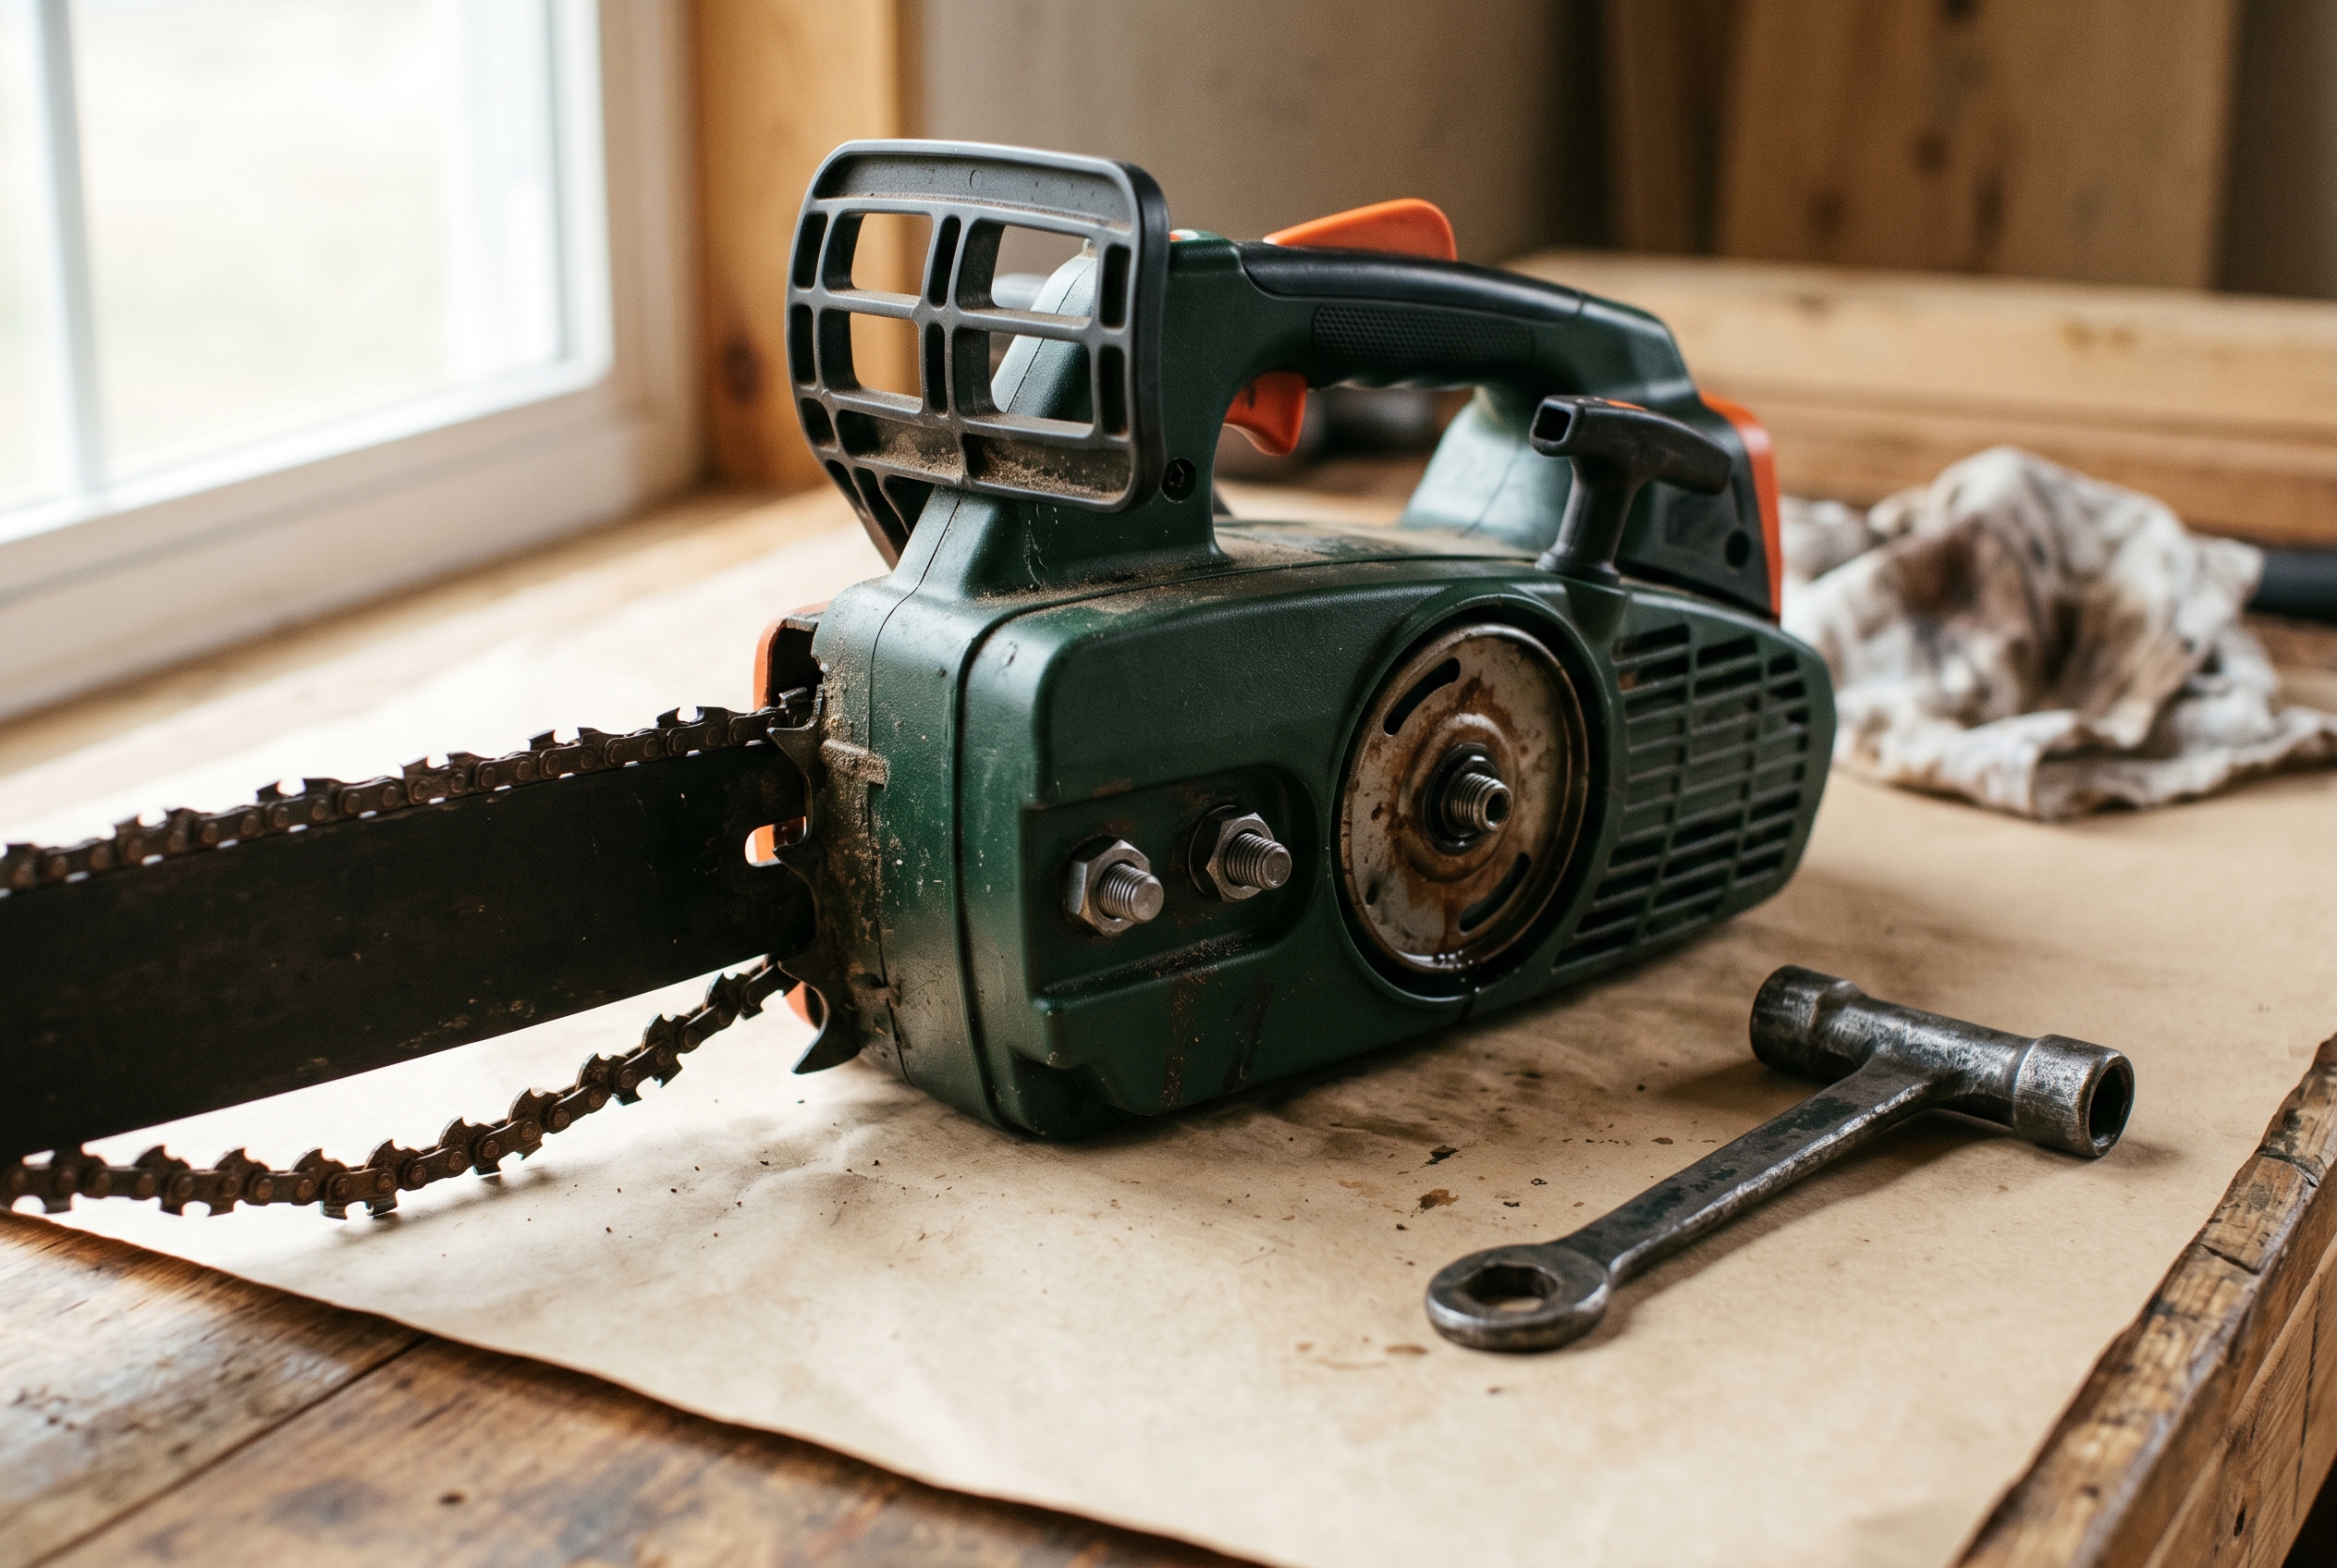
01 — Release chain tension and remove the clutch cover
With the saw cold and the spark plug cap lifted or the battery out, back out the tensioner screw on the clutch cover side several full turns. That slackens the chain. Then loosen both bar nuts with the scrench and pull the clutch cover straight off.
On most saws the cover lifts away cleanly. On a few with tool-less tensioners, the cover pops out with a tight pull. Do not force it sideways. The tensioner pin inside is plastic on several models and breaks easily.
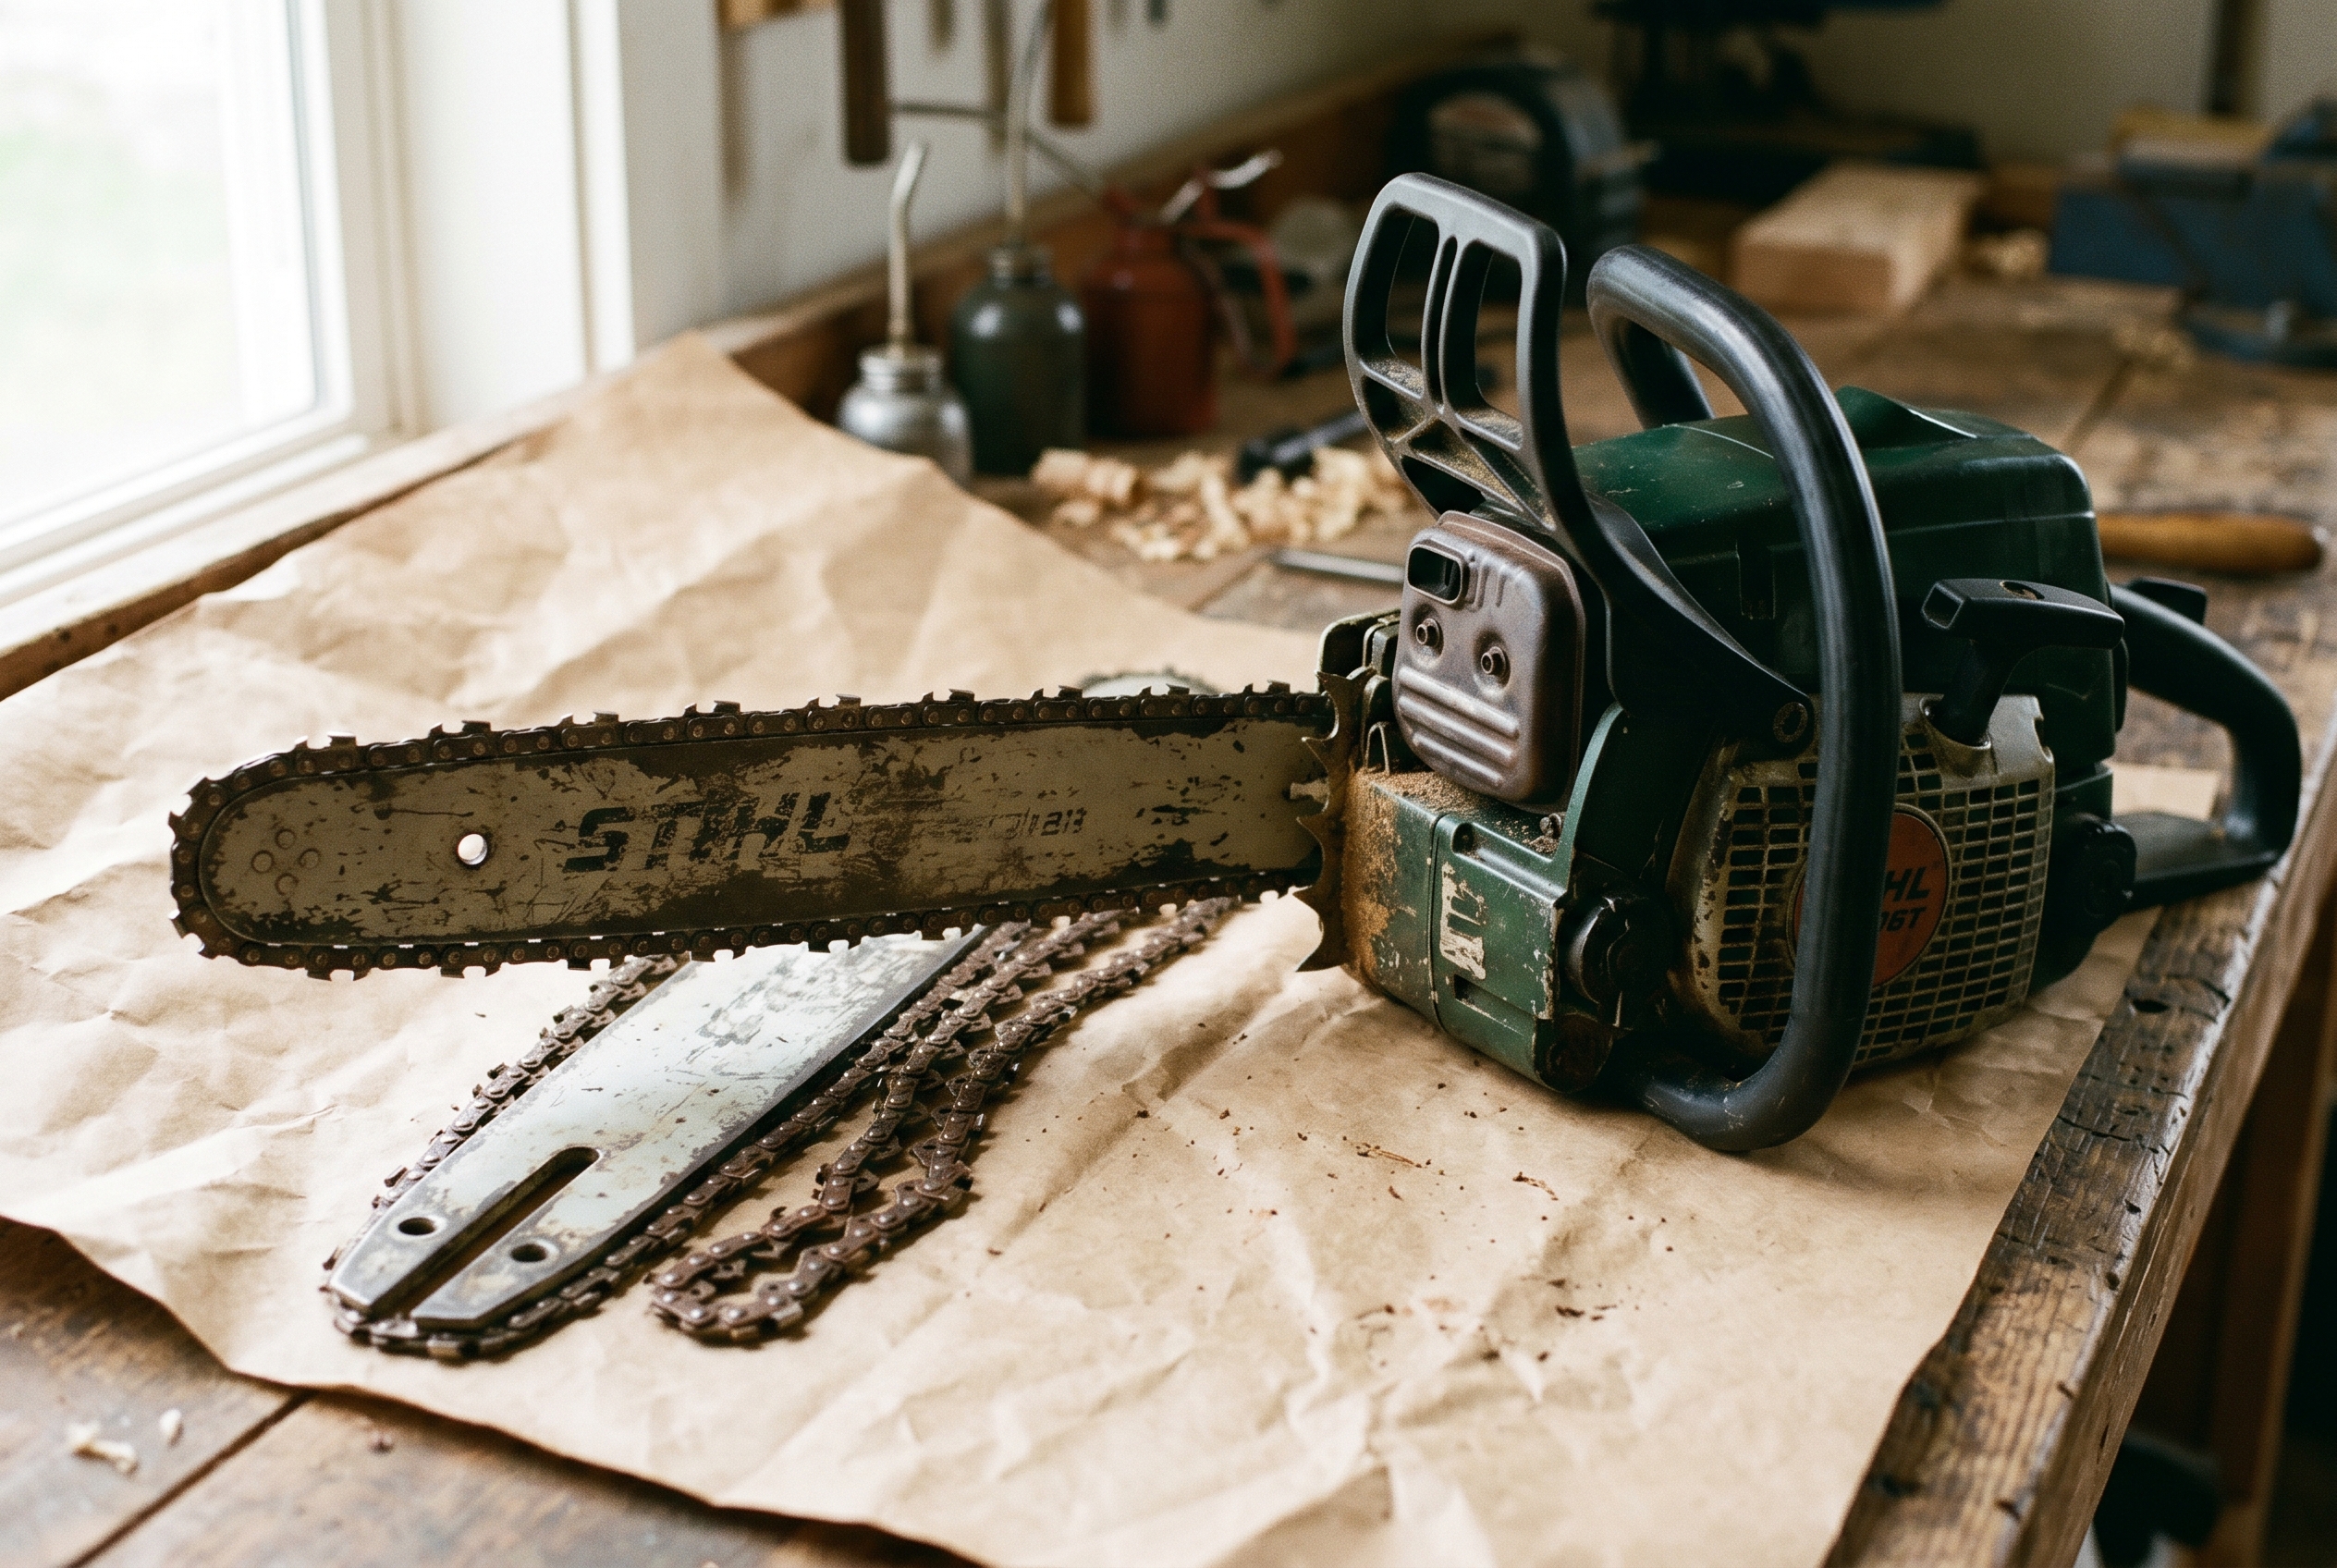
02 — Pull the old bar and chain off together
Lift the chain off the clutch sprocket first. The bar will slide forward and off the two studs once the chain is clear. Let both come off as a unit.
Now is the moment to inspect the sprocket. If the tooth profile looks hooked instead of triangular, or if the sprocket rim is worn below the chain's drive-link height, replace the sprocket before fitting a new chain.
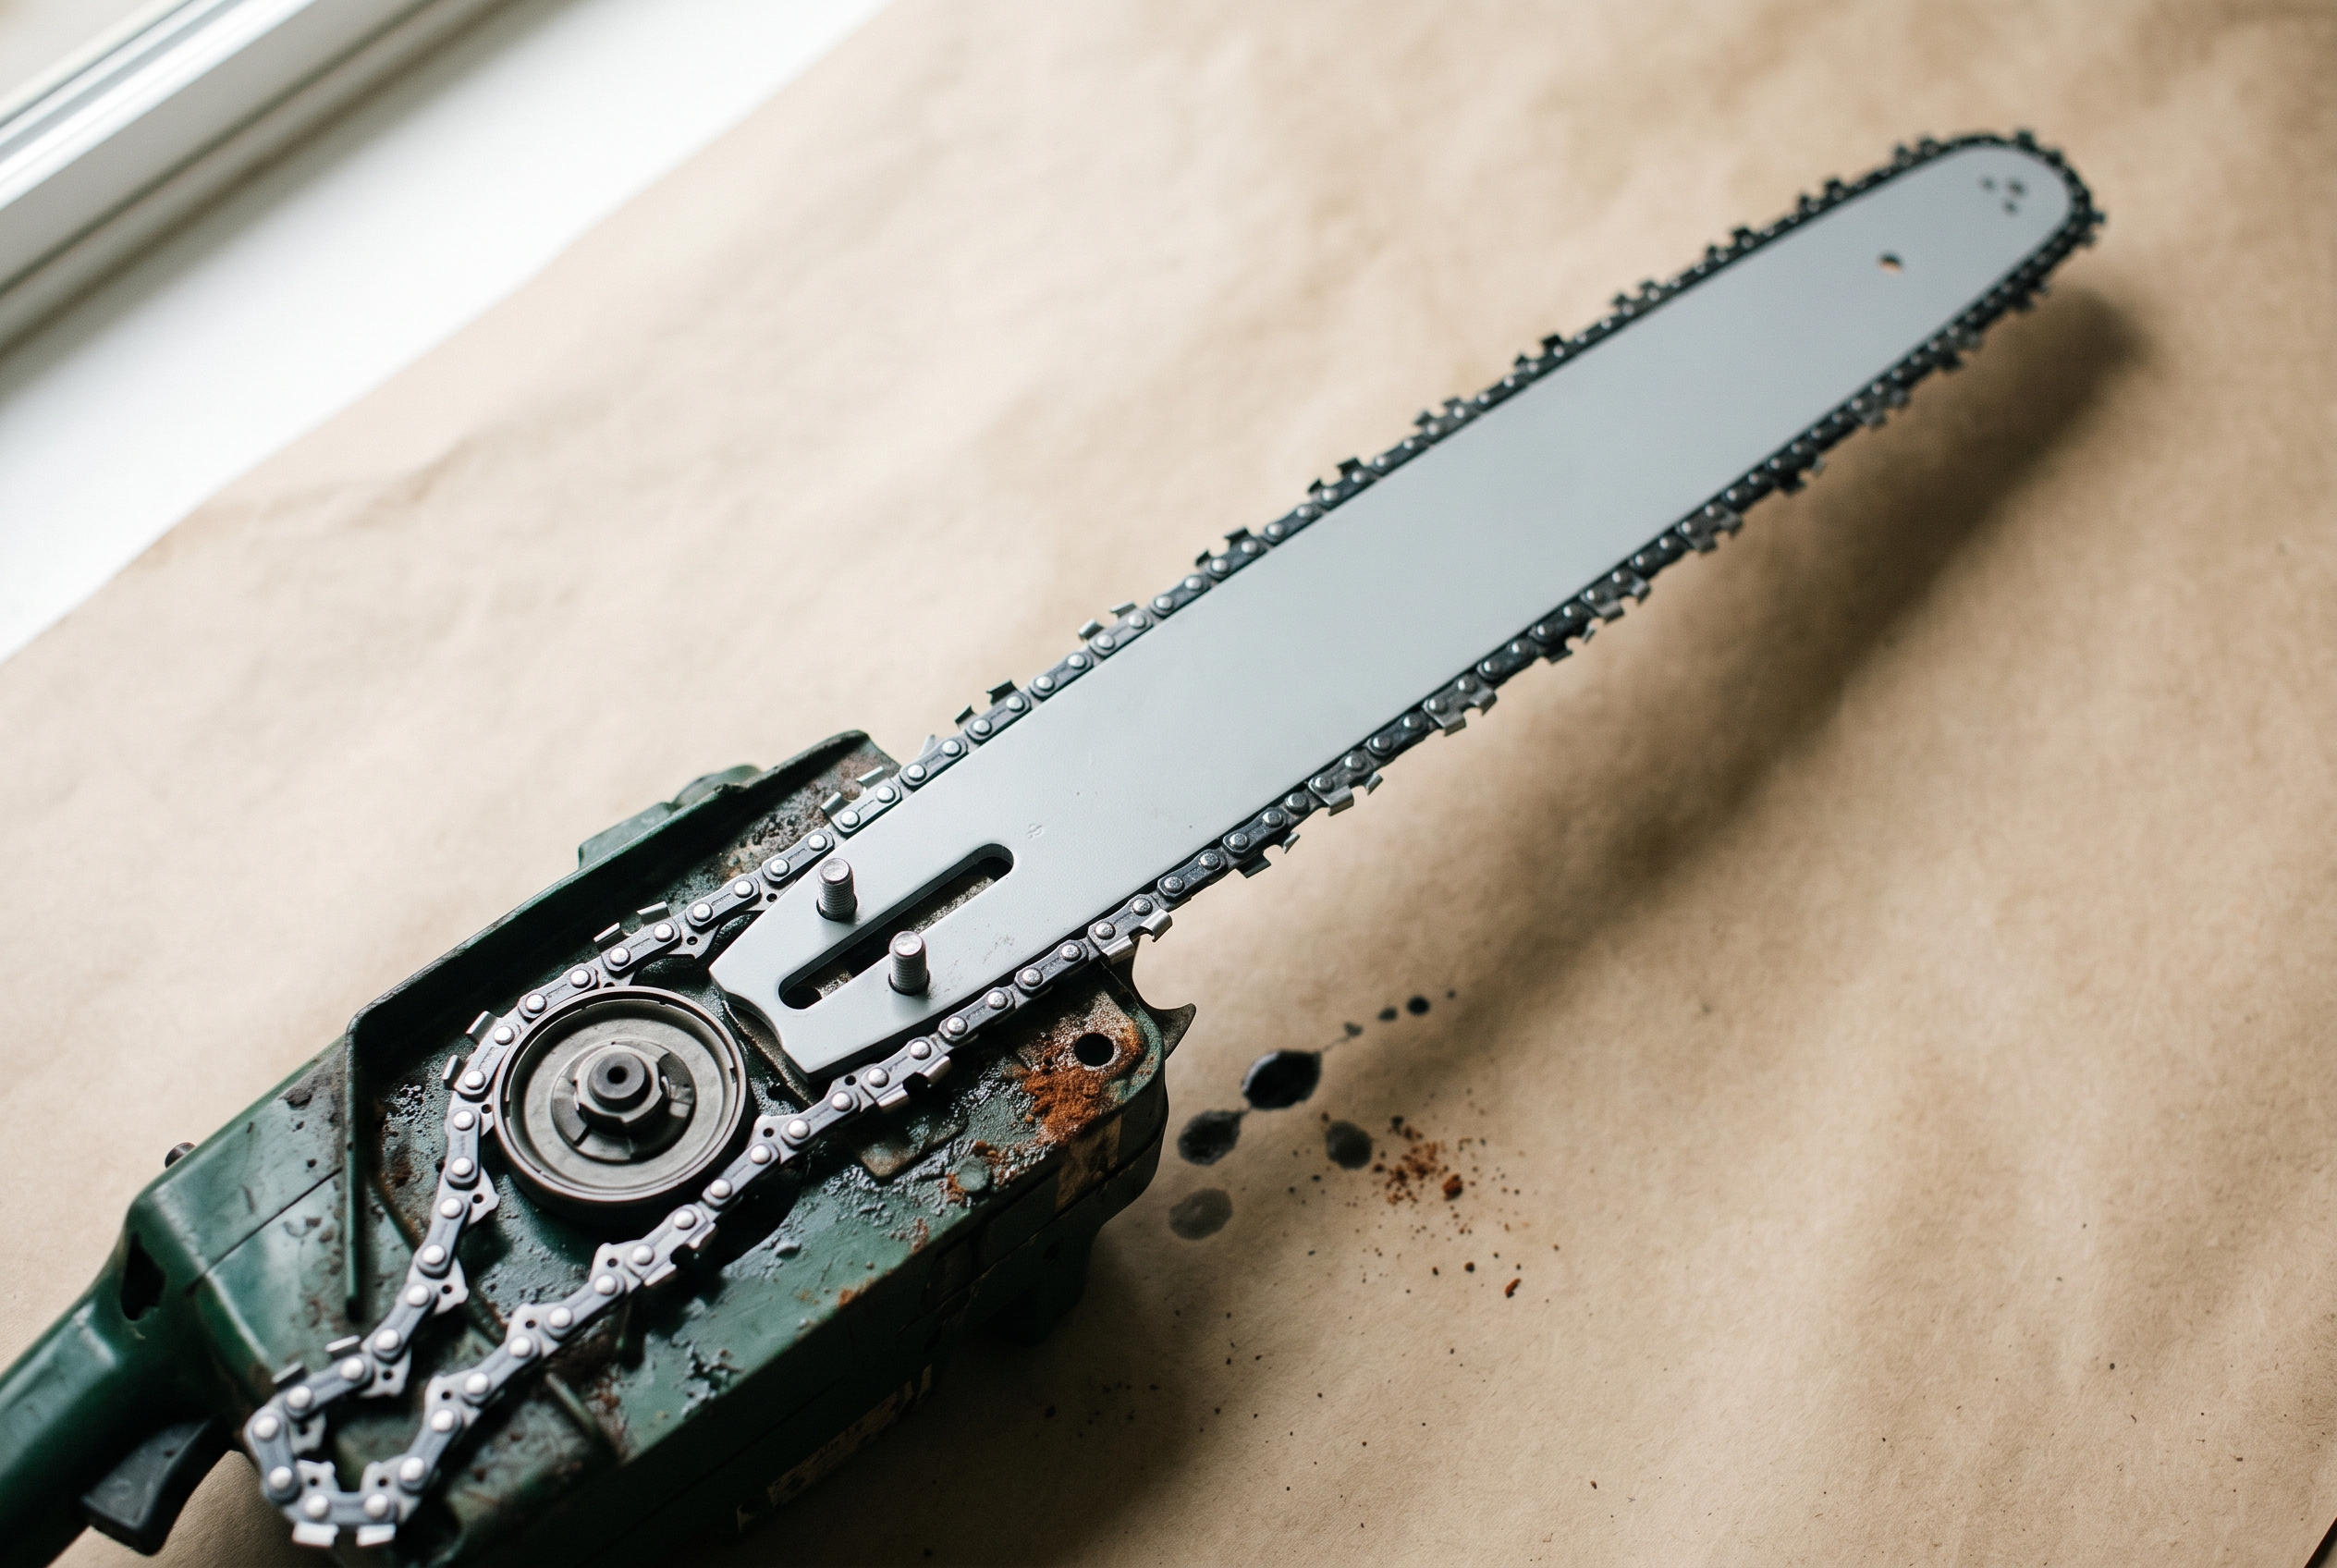
03 — Seat the new bar, drape the fresh chain on the sprocket
Slide the new bar onto the studs with the groove facing the saw. The adjusting pin on the saw case slots into a hole on the bar tail. If the bar will not seat, back the tensioner screw out further to retract the pin.
Drape the chain over the clutch drum sprocket first, then feed it forward into the groove along the top of the bar and around the nose. The cutters along the top of the bar should face forward, toward the bar tip. If they face rearward, the chain is on upside-down.
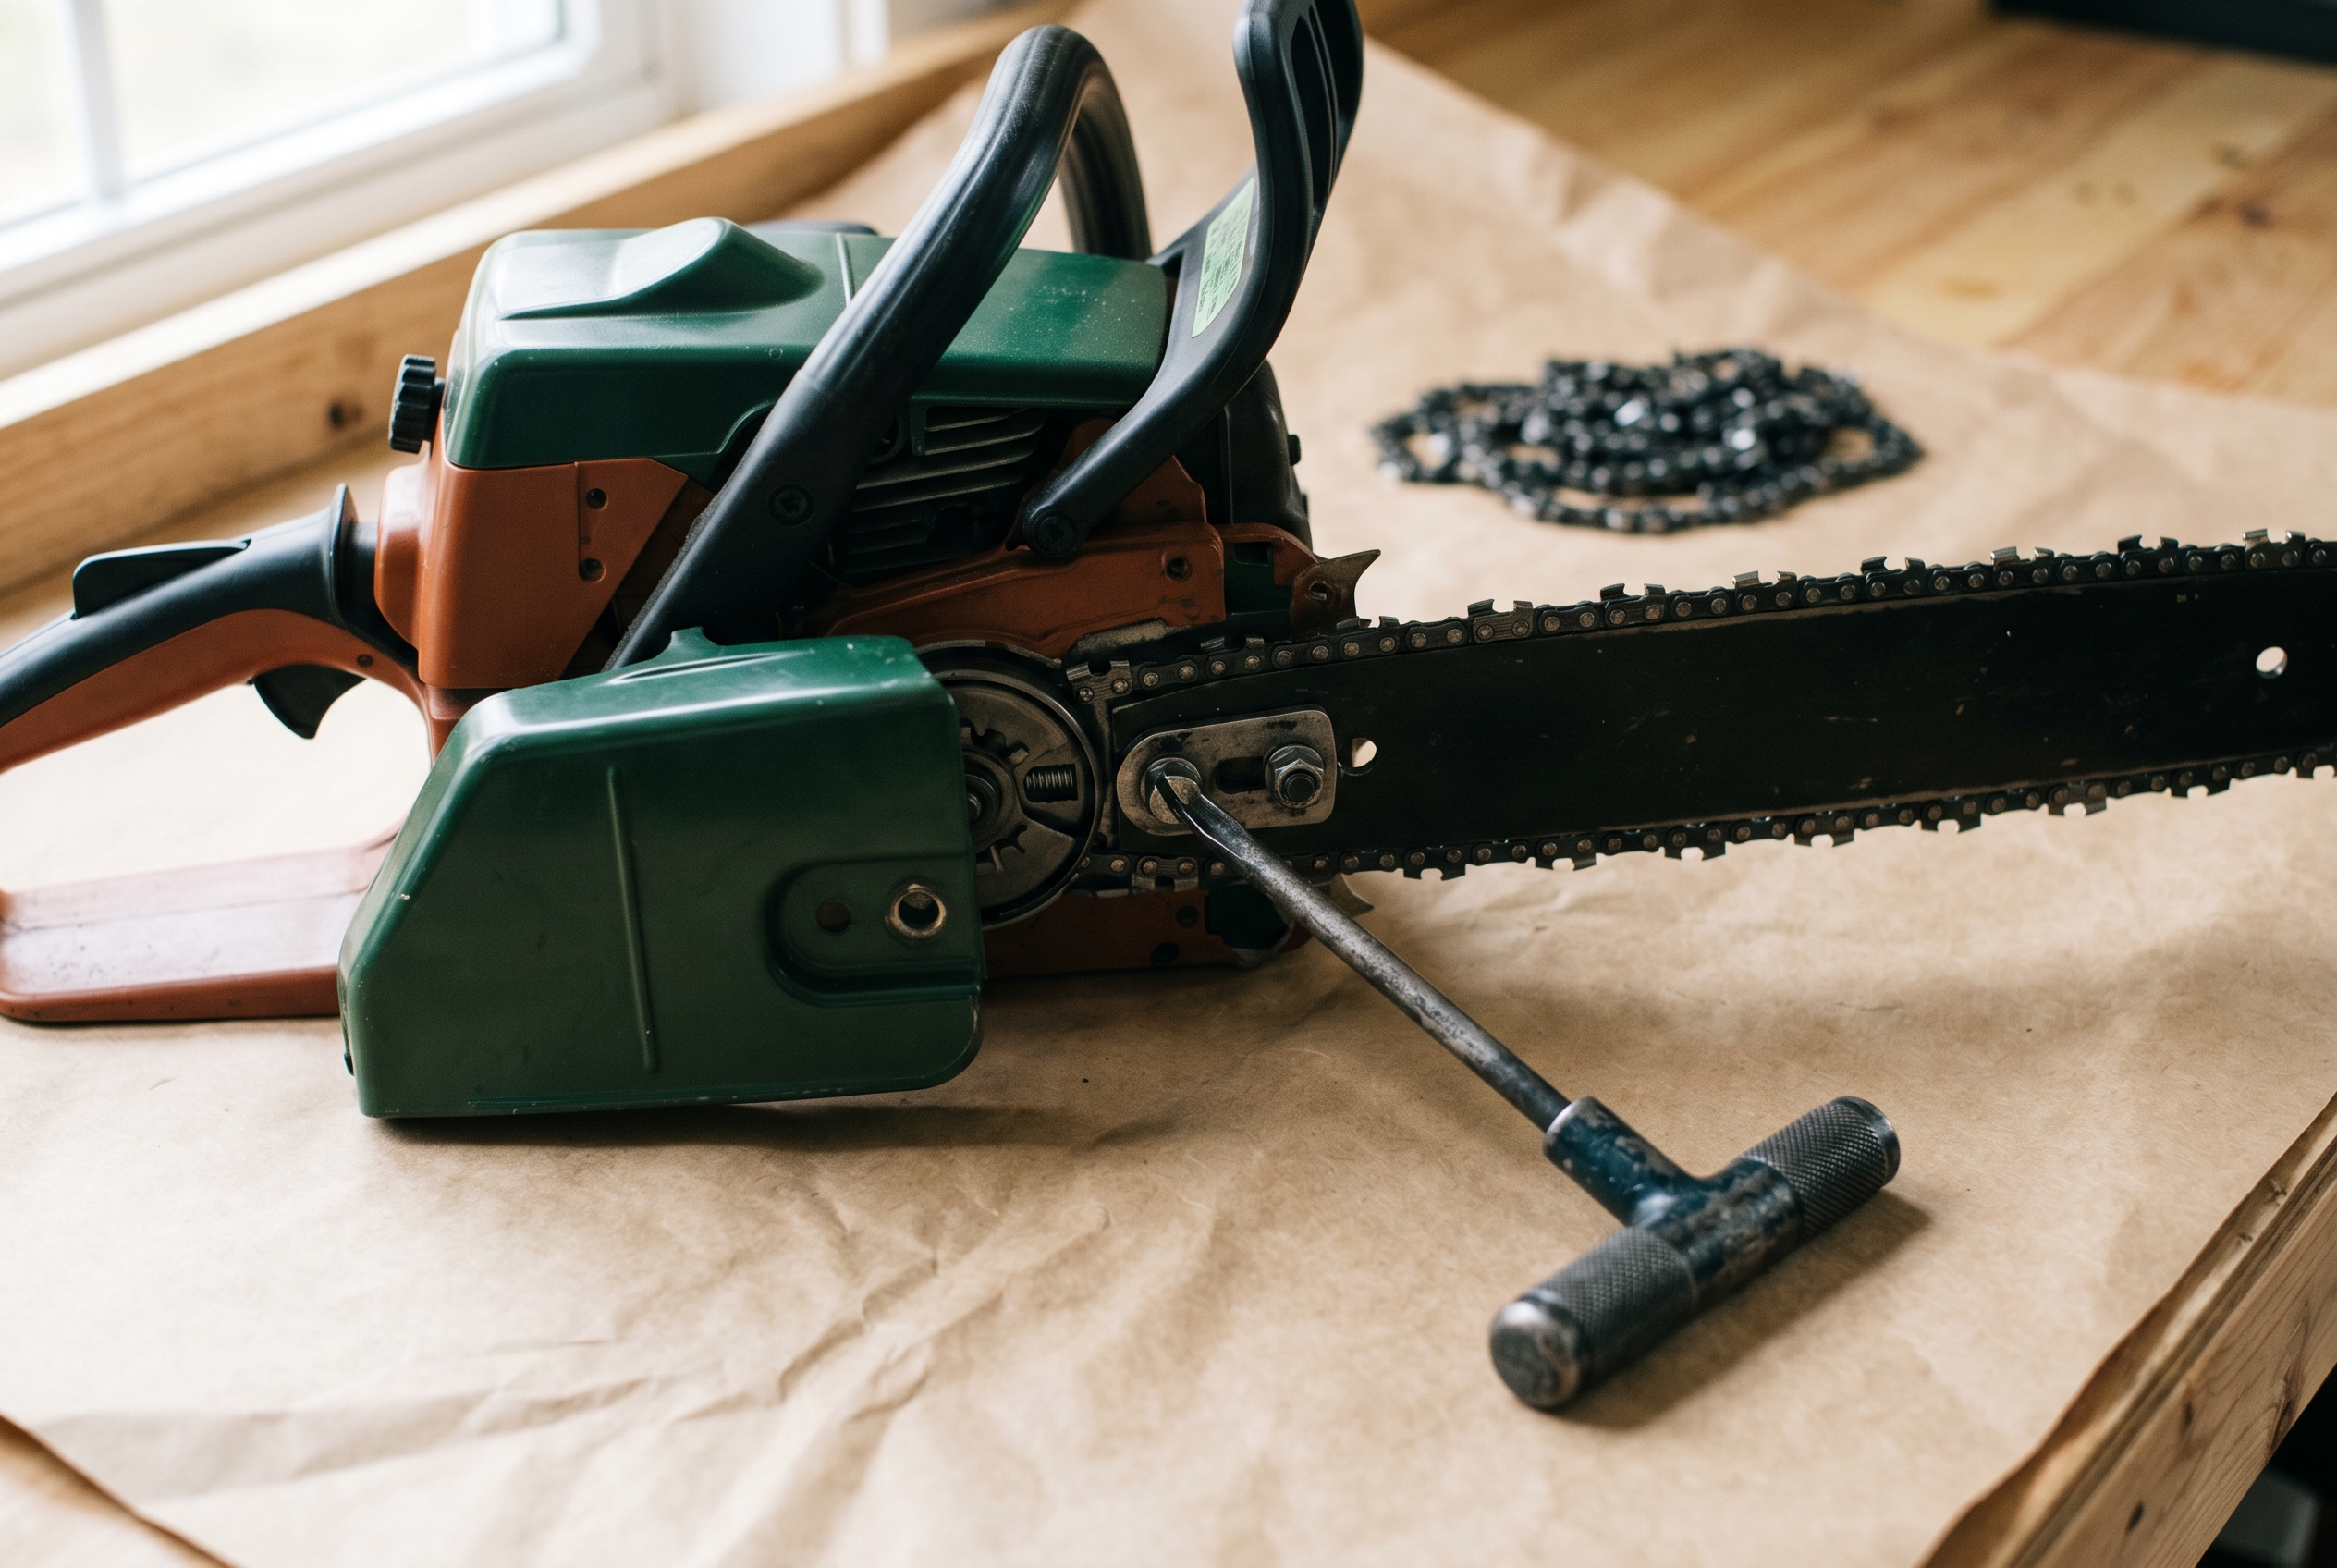
04 — Tension, torque, and verify chain lift
Refit the clutch cover, hand-tight on the bar nuts only. Then turn the tensioner screw clockwise. The chain should tighten toward the bar.
The correct tension is simple: with the saw flat, lift the drive link in the middle of the top of the bar. It should lift until the drive-link tips just clear the bar groove, and fall back fully when released. If you can lift it entirely clear of the groove, it is too loose. If it will not lift at all, it is too tight.
Once tension is right, torque the bar nuts to the saw's spec and rotate the chain once by hand. It should move freely around the bar without binding.
Break-in for the new chain
A fresh chain will stretch slightly on the first tank of fuel or first short battery session. Check tension after that first period and re-tension if needed.