
This independent field manual is written for RYOBI 40V-style walk-behind battery mowers used on suburban lawns, garden paths, and small properties. It is not an official manufacturer manual. Always confirm your exact mower model, blade length, center-hole shape, and torque specification against the label on your mower or the official manual before ordering parts.
Why blade replacement matters
A dull or bent mower blade does not just cut poorly. It tears grass, leaves gray tips, makes the mower work harder, and can create vibration that travels through the deck. If your lawn looks ragged after mowing, or the mower has hit a root, brick edge, or hidden stone, inspect the blade before the next full mow.
Before you tip the mower
Work on a flat driveway, garage floor, patio slab, or paved garden path. Do not do this in tall grass where the bolt, washer, or safety key can disappear.
Do this first:
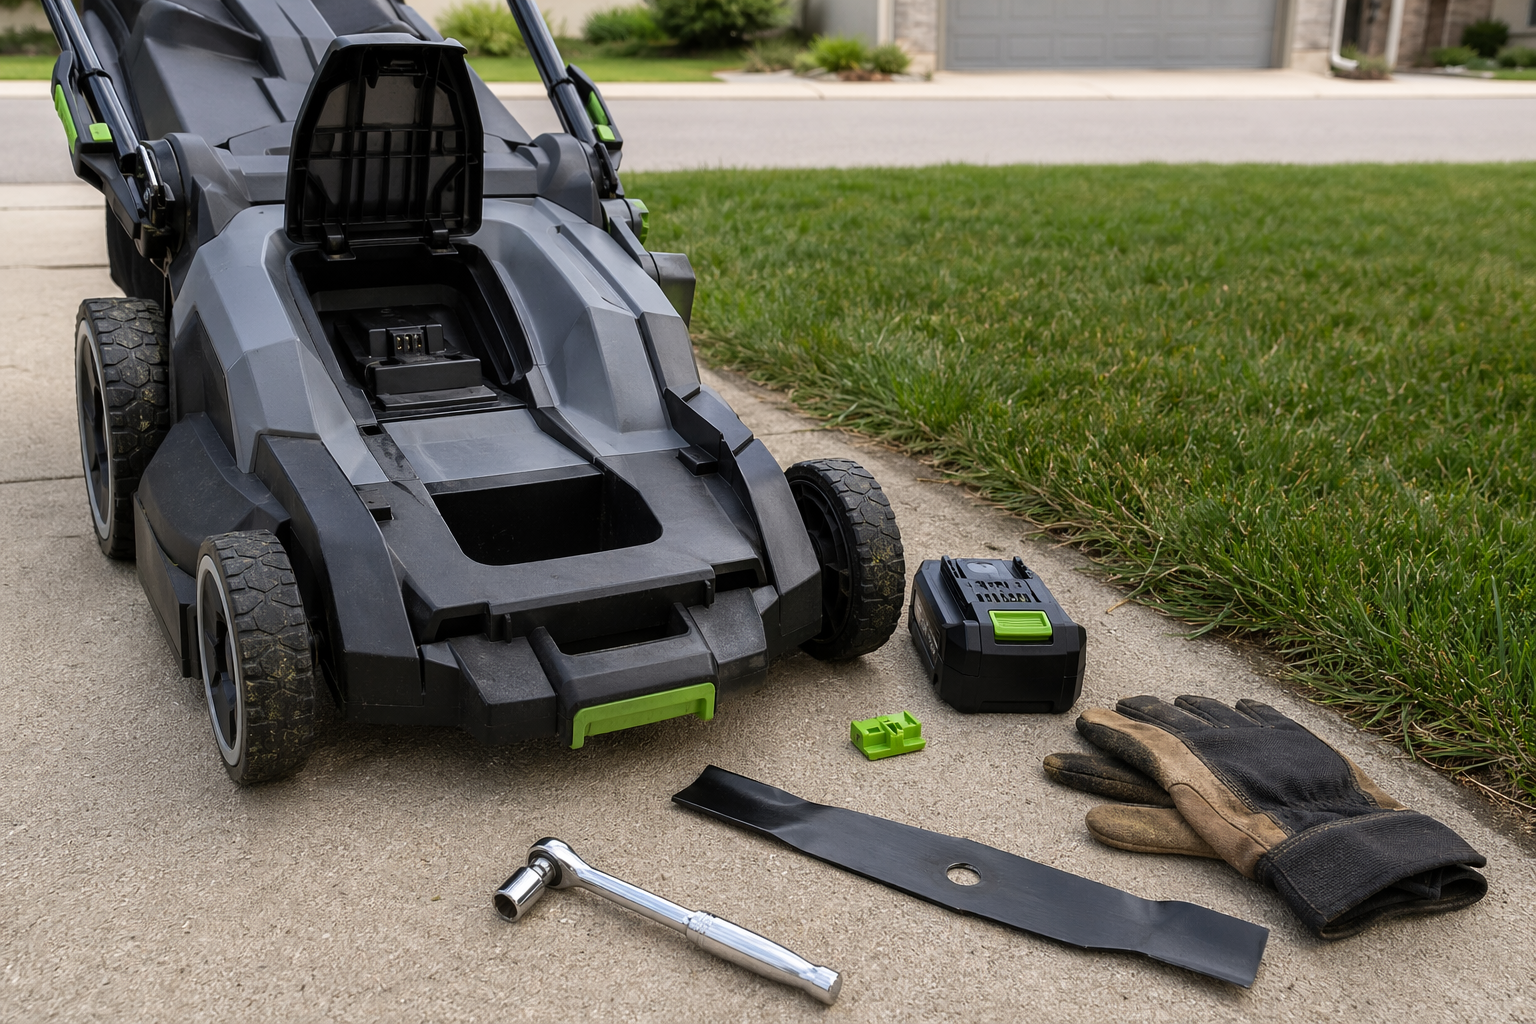
- Remove the battery pack.
- Remove the safety key if your mower has one.
- Wait until the blade is fully stopped.
- Brush loose grass away from the battery bay and deck edge.
- Put on gloves before touching the blade area.
The battery should stay several feet away from the mower until the new blade is installed, checked by hand, and the mower is back on all four wheels.
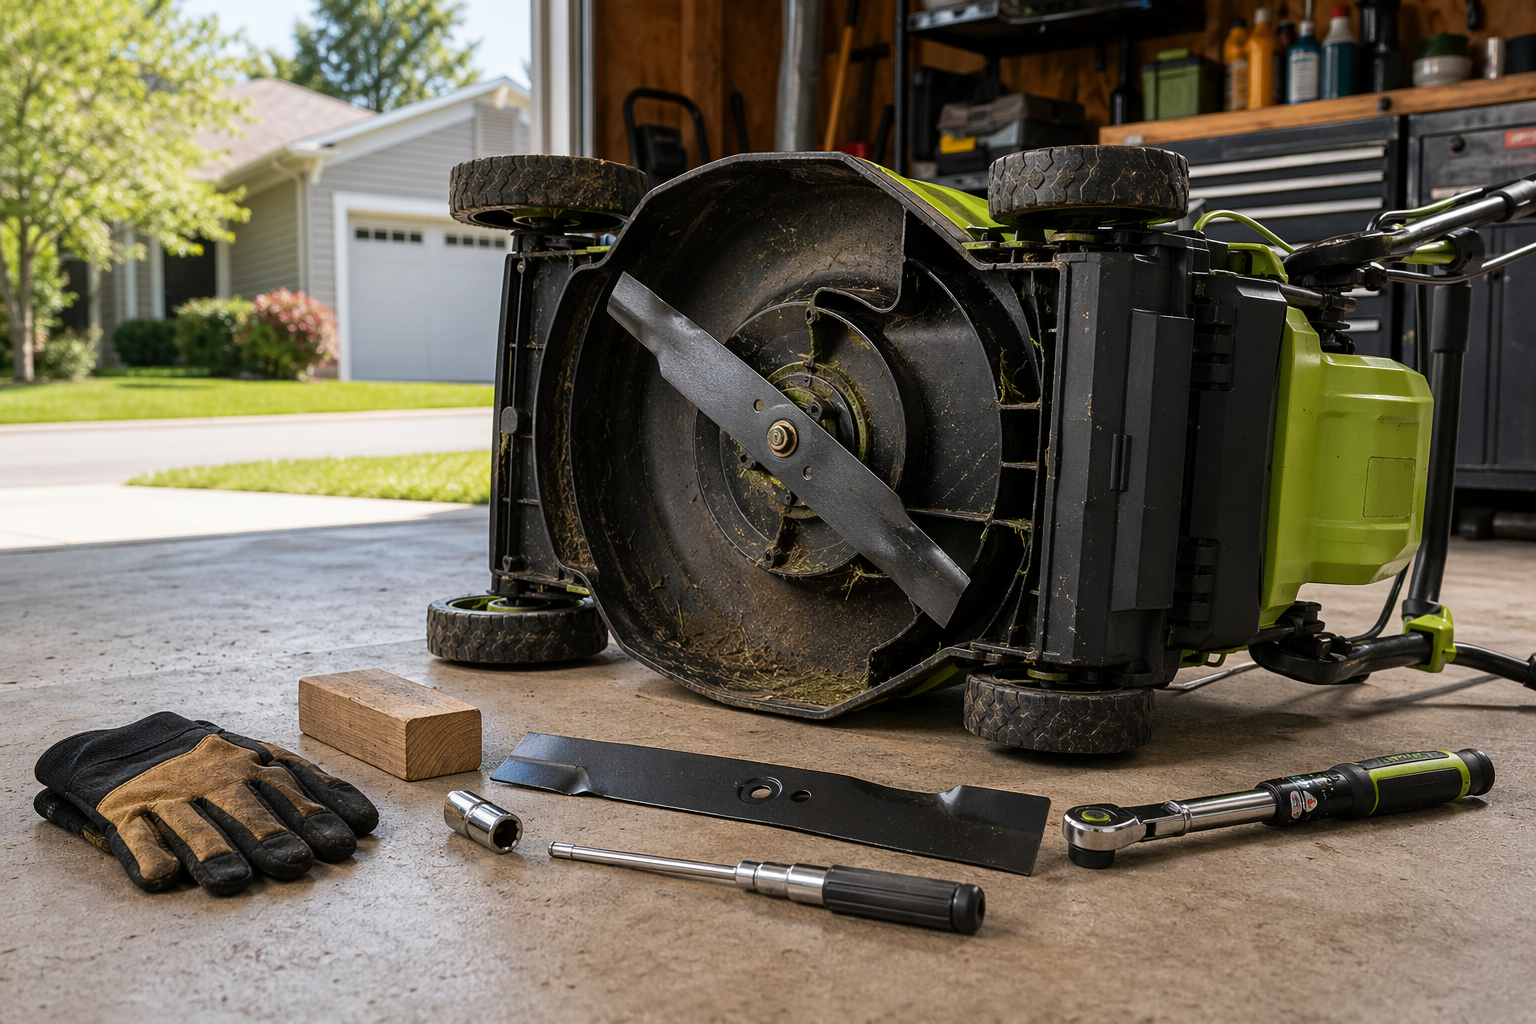
Step 1: Tip the mower in a controlled way
Tip the mower only in the direction recommended for your deck. For battery mowers, the goal is to keep the battery compartment, controls, and handle hardware from taking the weight. If the mower starts to rock or rest on a plastic latch, lower it and reposition.
A good service position gives you a clear view of the blade boss, center bolt, washer, and underside of the deck. Take a quick phone photo before loosening anything. That photo is your orientation reference when the new blade goes on.
Step 2: Identify blade orientation before removal
Most mower blades have a cutting edge and a raised sail or lift wing. The lift wing usually points up toward the deck. The sharpened edge faces the direction of rotation.
Compare these before removing the old blade:
| Checkpoint | What to look for |
|---|---|
| Cutting edge | The sharpened bevel should face the direction of rotation. |
| Lift wing | The raised wing should match the old blade's upward side. |
| Center hole | Shape and diameter must match the blade boss. |
| Locating holes | Any extra holes or pins must line up cleanly. |
| Blade length | Tip-to-tip length should match the original blade. |
If the replacement blade is close but not exact, do not force it. A blade that bolts on but does not seat flat can vibrate, loosen, scrape the deck, or cut unevenly.
Step 3: Remove the old blade
Block the old blade with a scrap of wood so it cannot rotate. Use steady pressure on the center bolt. Avoid bouncing on the wrench; sudden force can round the bolt or shift the mower.
Lay the bolt, washer, and adapter pieces down in order. If there is grass buildup around the blade boss, clean it before installing the new blade. Packed grass can keep the blade from sitting flat even when the bolt feels tight.
Step 4: Install the new blade
Place the new blade on the boss in the same orientation as the old blade. Start the bolt by hand first so you know it is not cross-threaded. Tighten evenly, then torque to the spec from your mower manual.
Before reinstalling the battery:
- Spin the blade slowly by gloved hand.
- Listen and feel for scraping.
- Check that both blade tips clear the deck.
- Confirm the blade sits flat against the boss.
- Make sure no tools are still under the mower.
Step 5: First-pass test on a small strip
Put the mower back on all four wheels, reinstall the battery, and mow one short strip of clean grass. Stop immediately if you feel vibration, hear scraping, or see clumping that was not there before.
After the short pass, remove the battery again and inspect the bolt and blade seating. A clean first check is worth the extra minute.
Troubleshooting after replacement
| Symptom | Likely cause | What to do |
|---|---|---|
| Heavy vibration | Blade not centered, wrong adapter fit, or bent replacement | Remove battery, reseat blade, compare old and new again. |
| Ragged grass tips | Blade upside down or dull replacement | Recheck bevel direction and lift wing orientation. |
| Scraping under deck | Blade installed against debris or wrong blade length | Stop using mower and inspect deck clearance. |
| Clumps behind mower | Wrong lift profile or wet grass buildup | Check blade profile and clean the underside. |
| Bolt loosens after test | Missing washer, dirty boss, or incorrect torque | Reinstall hardware in order and torque to manual spec. |
Good homeowner rule
Replace or sharpen the blade at the start of the mowing season, then inspect again after any impact. If you mow rough ground, near gravel, or around garden borders, keep one spare blade on the shelf so a bent blade does not end the weekend job.