
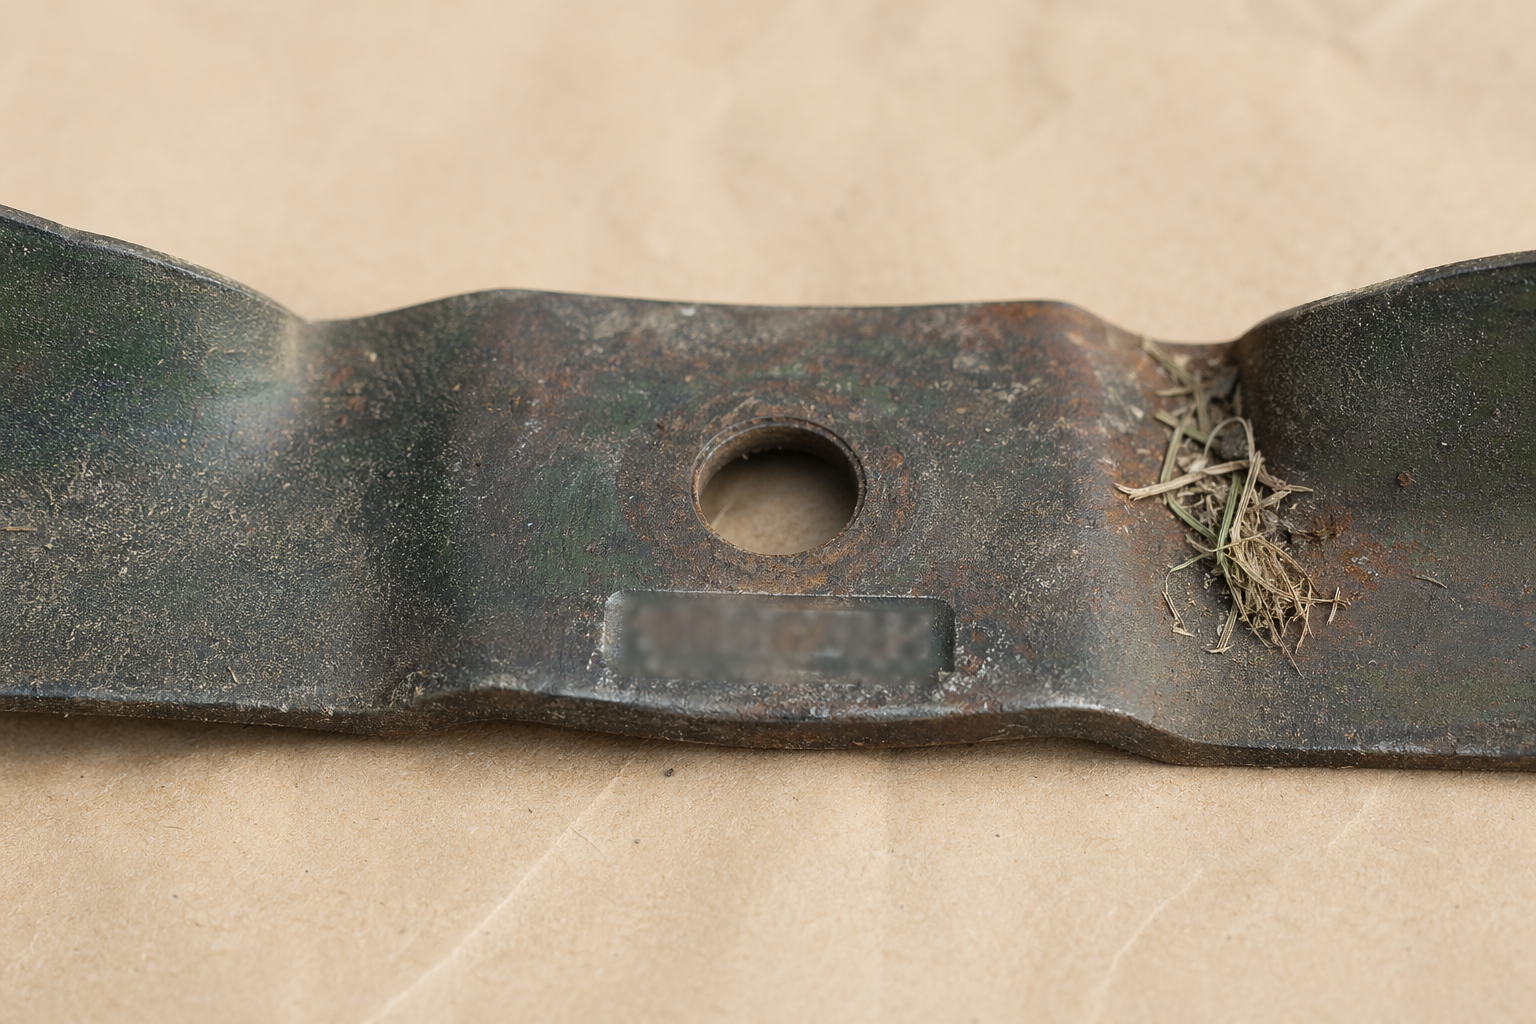
The stamp tells you what the blade is
Every OEM mower blade manufactured in the last twenty-five years carries a stamp. It is not always obvious. It is not always on the top face. It is almost never where the marketing photo suggests. But it is always there, somewhere on the blade, usually within two inches of the center hole.
Find it before you buy a replacement. A five-second stamp read will save you from a wrong blade three times out of five.
Where to look
In order of likelihood: (1) the top face of the blade, between the center hole and the trailing edge of one of the lift wings, usually a 4×15 mm stamped rectangle; (2) the bottom face, same region, on higher-end mulching blades; (3) stamped into the edge of the steel on older commercial blades; (4) printed on a small decal near the center hole on some European blades (decals fall off, so stamps beat decals for lifetime legibility).
https://img.manualstool.com/aporozona/tutorials/reading-the-mower-blade-stamp/SCENE_01.png
What the stamp looks like
It will be eight to twelve characters, alphanumeric, sometimes broken into groups with a dash or a space. Typical patterns:
- Briggs & Stratton family:
B&S 110-0012 A - MTD family (Troy-Bilt, Cub Cadet, Craftsman):
742-04308or942-04290C - Husqvarna / Poulan:
532406712or503746101 - Honda:
72531-VH7-000with a serial suffix - AYP / Sears:
AYP405380
Write it down. Photograph it if the light is bad. Either works for ordering.
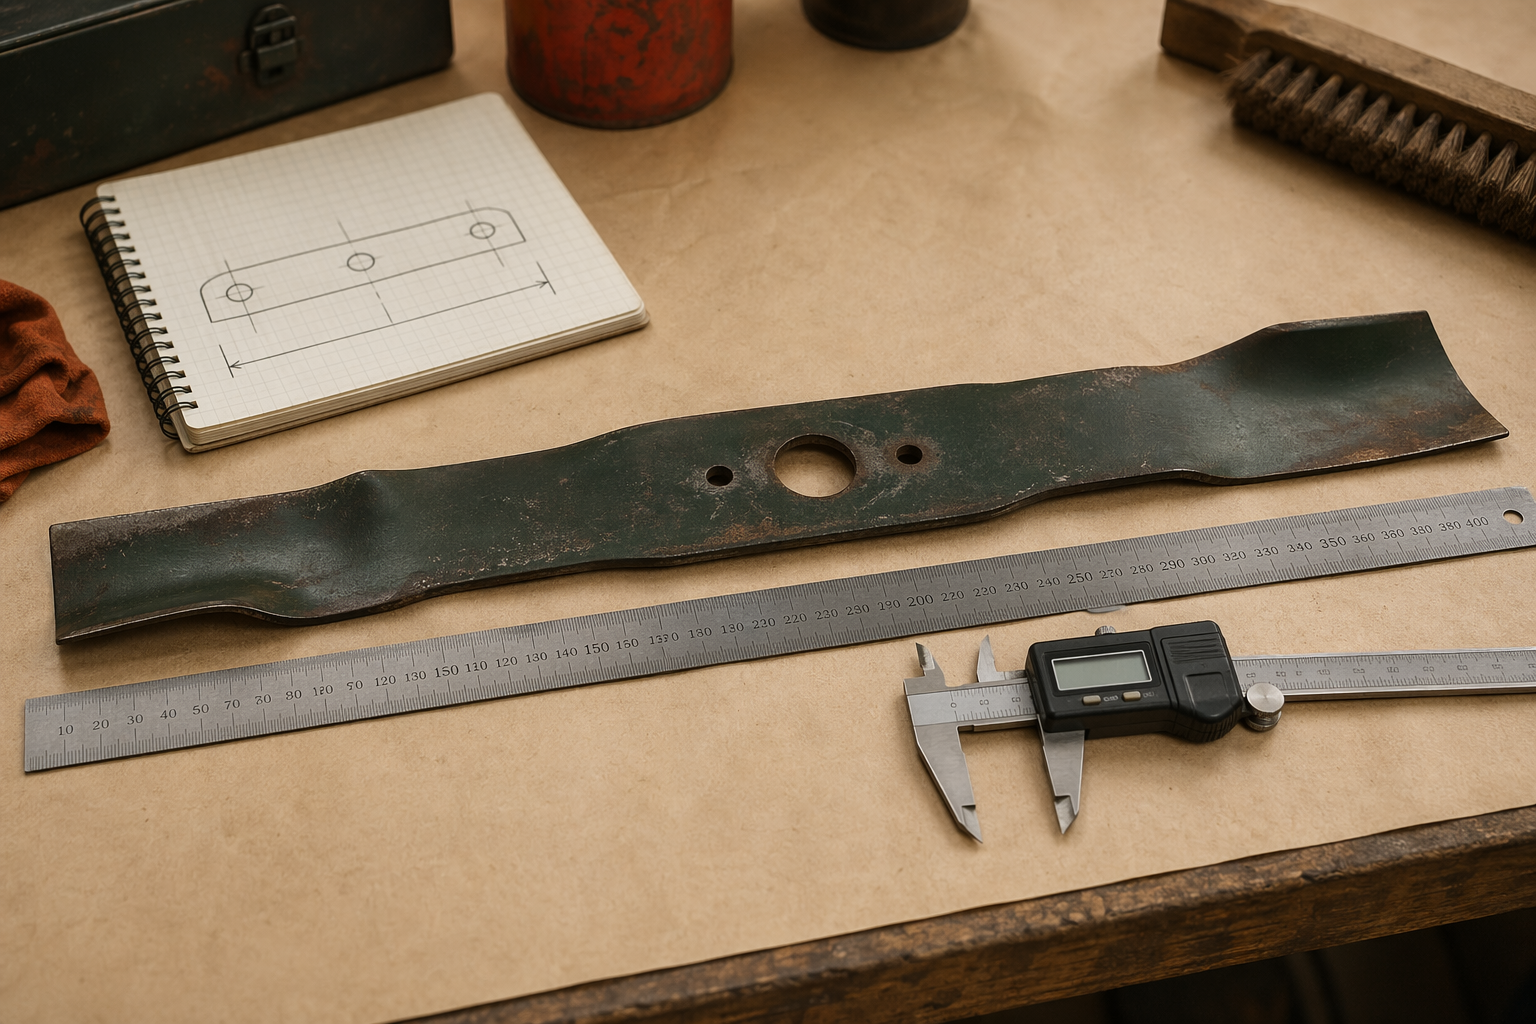
When you can't find the stamp
Some blades — older generics, blades that were sharpened past the stamp zone, blades that rusted on a wet mower for three seasons — are simply unreadable. In that case you measure.
Three measurements get a blade right 90% of the time:
- Tip-to-tip length. Lay the blade on a flat surface, stretch a steel ruler corner to corner. Read to the nearest 1/8 inch. Typical residential blades: 18″, 19″, 20″, 21″, 22″. (You'll rarely see 18 1/2″.)
- Center bore diameter. Put a caliper through the middle mounting hole. Round to the nearest 0.01 inch. Common values: 5/8″ (standard), 13/16″, 15/16″, 1″. Be careful — a 5/8 and a 13/16 visually look similar.
- Outer mounting hole spacing and shape. Some blades have two smaller outer holes; measure center-to-center and note the shape (round vs. slotted). This is how you differentiate blades with the same length and bore but different hub fitment.
Optional fourth measurement, useful for mulching and bag mowers: the lift wing height, measured at the steepest bend from the flat of the blade to the peak of the wing. Zero lift is a mulching blade. 1/2" lift is a standard-cut blade. 5/8″+ is a high-lift bag blade.
https://img.manualstool.com/aporozona/tutorials/reading-the-mower-blade-stamp/SCENE_02.png
Cross-reference twice, order once
Send the code or the three measurements to any aftermarket supplier's fitment team (APOROZONA's is [email protected]) before you place an order. A five-minute email exchange has saved more blade returns than any tool we know.
And before you install the new blade: note the top side with a grease pencil before you remove the old one. A blade installed upside-down cuts nothing and vibrates everything.